UN Intervention

UN InterventionUN Intervention

1947–?

The United Nations remained generally unable to influence the struggle between the superpowers due to Security Council veto power throughout the Cold War. However, it occasionally stood as a gauge for world opinion, and could mediate in stalled conflicts throughout the Third World. It was also the backdrop for a number of quintessential moments of the conflict, including the Soviet Korean War walkout, the “We Will Bury You” speech, and of course, the Cuban Missile Crisis—don’t wait for the translation Mr. Zorin!

Time: Early War
Side: Neutral
Ops: 1
Removed after event: No

UN Intervention’s nice event text comes at a cost: playing it cuts your handsize, eliminating your ability to hold a card to next round and posing a bit of a problem if you have multiple bad cards in your hand.  Accordingly, the Space Race is usually a better way to dispose of bad cards, but sometimes you will have no choice but to use UN Intervention.

Because UN Intervention prevents event text from triggering, it does not remove starred events from the game.  UN Intervention is therefore best played with unstarred events, or truly awful starred events. Something like Blockade hurts, but you’re probably better off just triggering it rather than using UN and reshuffling the card to return at a possibly more troublesome time.

DEFCON suicide cards are naturally the first priority for UN Intervention, especially CIA Created / Lone Gunman, which cannot be sent to space.  Otherwise, UN Intervention is best with very high Ops cards (which you could send to space, but would prefer having Ops — Marshall Plan is a good example) and unspaceable cards (which you can’t send to space).  In particular, UN Intervention is a great way for the USSR to dispose of the nasty US Mid War 1 Op events like OAS Founded.

In the Mid War, UN Intervention has interactions with U2 Incident (not meaningful) and We Will Bury You (much more meaningful).  As US, you should simply make sure you play UN Intervention (if necessary) before U2 Incident if you have both in your hands, and immediately after We Will Bury You (if you are so fortunate).

It is tempting to keep holding UN Intervention between Action Rounds to wait for a “bad” card to play it with (and to deny it to your opponent).  This is not a terrible idea, but be mindful that a) you are limiting the potential Ops in your hand; b) if you draw multiple DEFCON suicide cards, UN Intervention is not necessarily much help because of its handsize reduction effect.

Posted in Early War, Neutral Events | Tagged | 6 Comments

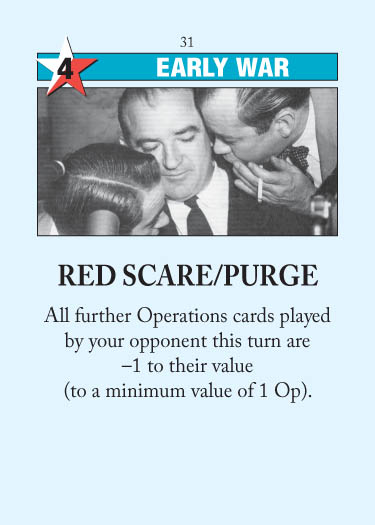
Red Scare/Purge

Red Scare/PurgeRed Scare/Purge

1945–1989

Sparked by fears that the “enemy is among us,” the “red scare” hit its apex with Senator Joseph McCarthy, and the hearings on “Un-American activities” in the House of Representatives during the 1950s. Soviet purges were a notorious aspect of power transition within the Kremlin. However, Stalin was the true master; 12 million people were imprisoned in his camps at the time of his death in 1953.

Time: Early War
Side: Neutral
Ops: 4
Removed after event: No

Red Scare/Purge is probably the all-around best event in the game.  Of course, there are situations where you will prefer to have other events in your hand, but ex ante, there is no better all-purpose event in the game for both sides.  Even if the event isn’t to your liking, it’s still a 4 Ops card in the Early War.

The event’s power varies from annoying to game-deciding.  If you already have a hand of 1 Ops, scoring cards, or cards you plan to play for the event, then Red Scare/Purge has little effect.  In the Early War, for example, so long as you have 3 of those cards (1 Ops, scoring, or cards to be played for the event), then you are losing 4 or less Ops overall.  Of course, 2 Ops in one play is better than 1 Op in two plays, and having your 2 Ops be cut down to 1 is especially painful when jostling for control of 2-stability country.

On the other hand, Red Scare/Purge can simply lose you the game.  It is a major hand management crisis when it knocks formerly dangerous-but-spaceable cards (like Grain Sales to Soviets and The Voice of America) down to an unspaceable 1 Op: now you must either play the card, or hold it to next turn.  If you have multiple DEFCON suicide cards, Red Scare/Purge will often make some of them unspaceable, thereby causing you to either lose by DEFCON or by forcing you to trigger really unpleasant events.

In addition, Red Scare/Purge strengthens certain events that are otherwise mitigatable by their Ops.  De Gaulle Leads France is a good example: if the US already controls France, then they can play this and then restore the 3 influence of damage with the 3 Ops.  Alternatively, if no one controls France, then the US can trigger the event and take it to 3/1, so that the USSR can’t take France with a 4 Ops.  Neither of these plays are available to the US any more if they are holding a De Gaulle that has been knocked down to 2 Ops: they are now forced to give up France (good for the USSR) or send the event to space (which allows it to come back again later for the USSR to do more damage with).

Finally, Red Scare/Purge is a nasty combo with Blockade and Quagmire/Bear Trap.  With the former, you can almost guarantee a West Germany loss; with the latter, you can sometimes force your opponent to skip multiple Action Rounds in a row.

After triggering the event, it is important to go on the offensive and play aggressively.  The number one way to waste Red Scare/Purge is to play defensively or timidly; if you aren’t creating threats for your opponent that he is unable to deal with because of his lack of Ops, then there’s no point to headlining it and you may as well have just played it for Ops.  Force your opponent to respond to your threats: even though he usually might be able to, he will probably eventually have to give up if he is under Scare or Purge.  On the flip side, if you aren’t in such a position to play aggressively, then you should seriously reconsider headlining this event.  Either hold it to next turn or use the 4 Ops to bolster your position.

In summary, I will almost always play Red Scare/Purge for the event.  In the Early War, when its Ops are most valuable, I will hesitate to do so if I otherwise have very few Ops, but in the Mid War and beyond, I will usually trigger the event (and use SALT Negotiations to play it again, if possible).  It’s a very powerful event, and playing it twice in the Early War can often decide the game.  But it’s easy to auto-play the event without carefully considering how to maximize its potential.

Posted in Early War, Neutral Events | Tagged | 34 Comments

Regions: Africa

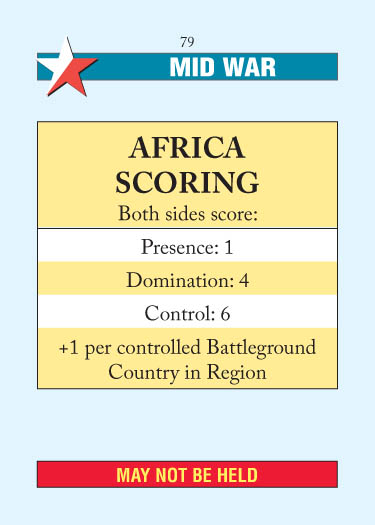
Africa ScoringAfrica Scoring

African history throughout the Cold War reflects the promise and tragedy that go hand in hand with that continent’s experience. At first buoyed by the political success of rapid decolonization, the jubilation would devolve into cynicism. One after another, newly independent governments would give way to “presidents for life”, political corruption, economic chaos, and ethnic violence. Lacking resources, African governments quickly took advantage of the superpower rivalry to maximize economic and military support for their regimes. In the post-colonial era, a variety of proxy civil wars were fought on the continent. Angola, Mozambique, Chad and Ethiopia were but a few of the nations that experienced violence, theoretically in the name of the global struggle between communism and capitalism.

Time: Mid War
Battlegrounds: 5
Countries: 18

General Considerations

Although theoretically lower-scoring than Europe or Asia, Africa Scoring is in practice often much more important.  Africa’s Early and Mid War events are much more powerful, and therefore lopsided scorings are more common.  It is very unusual for Europe to score more than 5VP for either side, but it is not at all unusual for one side to gain Africa Control and score 10 or 11VP.

The key theme of Africa is its low stability.  It has all three of the map’s 1-stability battlegrounds, meaning they are quite susceptible to being couped or even direct influence placement—it only takes a 3 Ops to flip control of a 1-stability battleground.  Overcontrol is therefore highly recommended in Nigeria / Zaire / Angola.

Given the lopsided scoring potential and low stabilities, it should be no surprise that Africa tends to be one of the “hottest” regions on the board.  As Jason Matthews noted, this accurately echoes the historical Cold War reality:

Africa has a disproportionate number of battlegrounds, but that was reflective of a stark reality—there was no other continent where the Superpowers played so frequently or so freely as Africa. You can make a case for Asia, but there the powers needed to play carefully. In Africa, it was a no-holds-barred game.

Africa’s battlegrounds are conceptually divided into three regions: Algeria, Nigeria, and Zaire/Angola/South Africa.  They are separated by volatile, easily-couped non-battlegrounds.  The most important non-battleground is Botswana: it plays a central role in potential realignments against Angola and South Africa.  A player trying to break into this subregion must account for the ample realignment opportunities down there, since it is very easy to get realigned out and have no way back in.

Morocco presents another interesting non-battleground, as it is the only non-battleground that offers meaningful stability.  If you are desperate to score Domination and cannot afford to spend time couping back and forth, then Morocco may be the non-battleground you need.

Early War

The US starts in South Africa and should, before the end of the Early War, move out into Angola and then Zaire.  This is because if the USSR successfully takes Angola first, then it will also nab Zaire while trapping the US in South Africa, leaving it vulnerable to a realignment from Angola and Botswana.  If the Soviets get into France, the US should look to claim Algeria first if it has influence in France: Algeria is a costly 2 Ops, but it is one of the most difficult battlegrounds to flip in Africa.

The USSR’s primary entry point into Africa is Decolonization.  Algeria can be infiltrated through Soviet presence in France, and of course if the US does take Angola/Zaire, the USSR can coup into those countries.

Mid War

Many Mid War events directly or indirectly target Africa.  The USSR has:

  • Portuguese Empire Crumbles
    • An easy way to secure a non-battleground and possibly flip Angola.
  • South African Unrest
    • A nice recurring event that can get you into a subregion if you are locked out.  The 1 influence in South Africa and 2 in a neighbor is usually the better choice, since it can flip Angola if it is not overcontrolled or take Botswana.
  • Decolonization
    • The Early War Decolonization establishes you access; the Mid War Decolonization can de-stabilize a whole series of battlegrounds, or grab a ton of non-battlegrounds to deny Domination.  It’s extra-powerful because of all the low-stability battlegrounds.  Ideally you will have played this twice by the time Colonial Rear Guards comes out.
  • Che
    • Being able to coup two non-battlegrounds at once is a gamechanger: a US player might move towards Nigeria by playing into Cameroon and Saharan States simultaneously, figuring that even if you coup one of those countries they can still make it into Nigeria.  Che is the perfect counter.

The US has:

  • Puppet Governments
    • If played early enough, this serves as a psuedo-De-Stalinization.  In Africa, this can usually get to Nigeria without having to go through coupable non-battlegrounds.
  • Nuclear Subs
    • If you have a hand conducive to it, Nuclear Subs will essentially win you every African 1-stability battleground by allowing you to freely coup away.
  • Colonial Rear Guards
    • See Decolonization, though the fact that it comes out in the Mid War instead of the Early War hurts a lot.
  • The Voice of America
    • Although it can target any non-European country in the world, it is particularly effective in Africa because it offers the potential to eliminate the USSR’s presence in certain subregions of Africa.  Unlike most other regions, it is difficult to move between African subregions, and so therefore it is much easier to deny entire swaths of battlegrounds to the USSR.  Can be followed up nicely with Puppet Governments.

The focus of the Mid War shifts according to the timing of the Scoring Cards, but in general Africa takes high priority due to its high scoring potential and volatile low stability.

Late War

No new event targets Africa in the Late War.  Nevertheless, it continues to be a hot spot in the Late War for the same reasons as before.  Many of the key Africa events are recurring (in particular, Decolonization / Colonial Rear Guards) and can be a nasty Turn 10 surprise.

Posted in Mid War, Neutral Events, Regions | Tagged | 4 Comments

Decolonization

DecolonizationDecolonization

1947–1979

While it is hard to put precise dates on the decolonization process, those dates chosen represent two of the most significant decolonization successes. Sparking the retreat from empire was Britain’s fulfilled promise of independence for India in 1947. At the other extreme, Rhodesia’s first majority elections spelled doom for the apartheid system.

Time: Early War
Side: USSR
Ops: 2
Removed after event: No

As USSR

Decolonization is the best recurring USSR event in the game.  In the Early War, it gives the USSR access to two key regions that the USSR otherwise has difficulty getting into.  In the Mid War, it becomes one of the few (and strong) “add 4 influence” events.  The fact that it comes out much earlier than its US counterpart (Colonial Rear Guards) means that first, the USSR can get to and control countries in those regions before the US, and second, on average, it will be played more often.

Where should I Decolonize into?

As much as possible, you want to Decolonize into Africa rather than Southeast Asia.  There are several reasons for this: chief among them is that Africa has multiple open battlegrounds, whereas Southeast Asia only has one.  Of course, Asia will be scored before Africa is, and Southeast Asia will be scored on top of that, but Decolonization into Asia is primarily to jumpstart your access.  Sooner or later, you will get into Southeast Asia via some combination of crawling east from Iran and Vietnam Revolts.  Africa, on the other hand, can be very difficult to fight back in without Decolonization’s help.  It is much easier to defend those countries than to flip them, and the US has a head start in access via South Africa.

Turn 1 considerations

On Turn 1, you must be mindful of DEFCON’s effect on Decolonization.  Decolonizing into Thailand at DEFCON 4 is a mistake, because the US will just coup you right out, and worst case scenario you’ve just handed the whole region to them.  Likewise, Decolonizing into the African battlegrounds at DEFCON 3 is just handing the US a coup target.

Ideally, you will play Decolonization at DEFCON 2 and with the US having no access to Thailand.  You can then take your choice of Decolonizing directly into Thailand, or Decolonizing into Malaysia and then grabbing Indonesia as well.  If the US is already in Malaysia by the time you trigger Decolonization at DEFCON 2, then you can only place 1 into Thailand and bank on using the China Card to try to take it back if the US only places 3 influence into Thailand.

If you are going to Decolonize into Southeast Asia at DEFCON 4, the US usually won’t be in Malaysia yet.  In that case, I like to drop one into Malaysia, which is more difficult to coup out, and in a best-case scenario can seal the US off from access to Thailand altogether.  I am not worried about my Africa Decolonization influence, because if he coups me there I can just coup him back.

Turn 2 / 3 considerations

DEFCON should no longer be a concern here, as it is probably at 2.  How Decolonization plays out will depend on how much progress you two have made into Southeast Asia:

If neither side has much influence: then rejoice and take the region by dropping one or two Decolonization influence in there.

If you dominate it: you probably don’t need any Decolonization influence there, but 1 into Indonesia is a nice 1VP for Southeast Asia scoring.

If the US dominates it: You should still drop one into Thailand so that you can meaningfully contest the region, and maybe another into Laos/Cambodia to stop the US spread into Asia.  But unless you’re headlining Decolonization, this is unlikely to flip Thailand to your side, since the US can probably just repair 1 or 2 influence worth of damage in Thailand.  The point is to establish some access so you can do things like threaten use of the China Card or Vietnam Revolts.

Specific African countries

In Africa, Angola is the most critical country to play into, if the US hasn’t already.  It gives you both Zaire and Angola, and opens up possibilities for a Botswana play into an easy Africa domination or a South Africa realignment, eliminating all US presence in Africa.  Algeria is next in importance, if you have not yet established access to France, because it provides a back-door into the country.  (This is an example of Decolonization’s power: when you play into both Thailand and Algeria, you are often forcing the US to confront multiple threats at once, and there is no way they can defend all of them simultaneously.)  Nigeria is third (though sometimes more important than Algeria if France is already settled), because it is a country that is otherwise inaccessible without going through an easily-couped non-battleground.

You can think of Africa as being divided into three subregions, divided by non-battlegrounds: Algeria, Angola/Zaire/South Africa, and Nigeria.  You want access to all three of them, and although De Gaulle does give you access to Algeria, the only way to get into all of them is with Decolonization.

Early War summary

In the Early War, I will normally drop only one into Southeast Asia, because I will eventually have access to the region anyway and it will merely jumpstart my progress there.  Depending on DEFCON and the US position I will place it in Malaysia, Thailand, or sometimes Burma.  The remainder of the influence will go into Angola, Algeria, and Nigeria.

Decolonization is such a valuable card that I rarely headline it in the Early War if I am at all concerned about Defectors.  Losing it to Defectors is so costly that I would rather be safe and play it on an Action Round unless I knew that Defectors isn’t being headlined (because it’s already been played, because I have it in my hand, or via some psychological read of your opponent, if you are confident in such things).

Past the Early War

In the Mid War, Decolonization remains a top-tier card because it evolves into a “drop 4 influence in Africa” event.  By this time, Southeast Asia is likely sewn up, and the fact that it can put 4 influence into a region with mostly 1-stability battlegrounds is still game-changingly powerful.

As US

Along with De-Stalinization, this is a card so powerful you can’t even send it to space until after the Turn 3 reshuffle.  If I’m not able to hold it to Turn 3, I will absolutely send it to space, or hold it until I can.  It is of such importance that I would rather trigger Blockade and lose West Germany before triggering Decolonization: at least then, the USSR has to invest 4 Ops to get the 2VP swing.*  Decolonization will mean much more than that, come Africa Scoring (or sometimes Asia Scoring).

In the Mid War, Decolonization is still very bad, since it is only a 2 Ops card and you need 4 Ops to repair its damage.  It can be one of those AR7 plays (to mitigate its effect), but more commonly it is just an auto-space.

Its existence is why I try to get into Angola and then Zaire as quickly as I can.  USSR control of Angola cuts you off from two battlegrounds and puts you at a severe disadvantage in Africa.

* Of course it can be more than 2VP, depending on whether it hands over Domination VPs or possibly Europe Control.  If you must lose West Germany, then as the Blockade article notes, you should do so on the last AR.

Posted in Early War, USSR Events | Tagged | 12 Comments

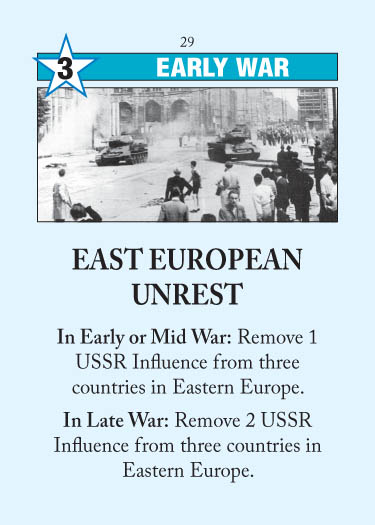
East European Unrest

East European UnrestEast European Unrest

1956–1989

Captured most visibly by Nagy’s attempt to withdraw Hungary from the Warsaw Pact and Czechoslovakia’s Prague Spring of 1968, members of the Warsaw Pact frequently sought to loosen the reins of Moscow. When taken too far, from the Soviet perspective, the effects could be devastating. Soviet tanks became a universal symbol of Soviet determination to hold on to Eastern Europe, through undisguised oppression if necessary.

Time: Early War
Side: US
Ops: 3
Removed after event: No

As USSR

In the Early War and Mid War, this is generally at worst an empty Action Round and nothing more.  If under Red Purge, then it’s slightly worse than an empty Action Round, but the only two countries that really matter to you in Eastern Europe should be East Germany and Poland.

Much as the threat of a Socialist Governments headline forces the US to slightly overprotect its Western European battlegrounds, so too does East European Unrest force the USSR to overprotect its battlegrounds, as otherwise an EEU headline would be quite awkward for the USSR.  And if you’ve overprotected the two battlegrounds enough (or Comecon / Warsaw Pact did it for you), then this isn’t even an empty Action Round, and you can freely spend the Ops elsewhere.  Think of it as transferring 3 Ops from Eastern Europe to somewhere else.

In the Late War, this card is absolutely miserable.  Losing 4 Influence from East Germany / Poland simultaneously, right as you’re being hit with Chernobyl / Tear Down This Wall / Solidarity, can be brutal.  It’s not quite as bad as the others, but it’s a good candidate for the Space Race.  Be glad you drew it and not the US.

As US

In the Early War and Mid War, you usually have something better to do than remove from 3 Influence from overprotected or irrelevant countries.  It can be a decent headline (threatening Europe Scoring on AR1) or AR7 play, but usually the USSR has overprotected East Germany and Poland enough that there’s not much point to it.

In the Late War, this card is an absolute monster.  Combined with all the other pro-US Europe cards, being able to delete two influence from East Germany and Poland simultaneously is huge.  It’s more than just a 4Ops equivalent: its real use is to break USSR control of the two countries, allowing you to pour in influence without paying the 2-for-1 penalty.  Coupled with Chernobyl, it opens the floodgates to the Late War American takeover of Europe.  If you draw it on Turn 7, do everything in your power to hold it until next turn.

Posted in Early War, US Events | Tagged | 8 Comments

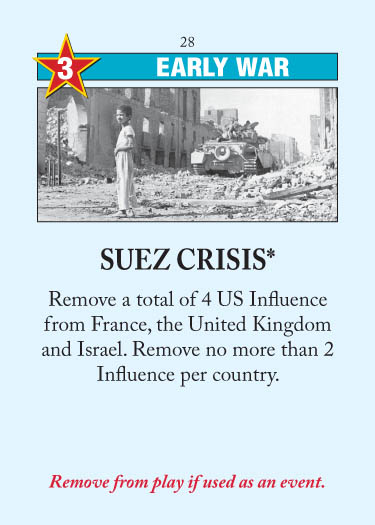
Suez Crisis

Suez CrisisSuez Crisis

1956

An embarrassment among allies, the Suez Crisis ended any remaining doubt that the old system of Great Power imperialism was dead. Threatened by Nasser’s nationalization of the Suez Canal, Israel, France and the United Kingdom conspired to alter Egyptian policy at bayonet point. They failed to appreciate Eisenhower’s aggravation at their unannounced initiative. Though initially militarily successful, the three powers were compelled to withdraw under American pressure.

Time: Early War
Side: USSR
Ops: 3
Removed after event: Yes

As USSR

One of the five great Turn 1 USSR headlines.  If you combine it with a successful Iran coup, then you have eliminated the US from the Middle East entirely, and they will have a very difficult time getting back in until the Mid War.  I will therefore almost always headline Suez Crisis on Turn 1 if I draw it, even ahead of Red Scare/Purge.

After your Iran coup on AR1, if the US doesn’t expand out of Israel, then you can use Suez Crisis on AR2 for the same effect.  A good US player will make sure to expand into Lebanon or Jordan quickly, however, and then Suez Crisis is not that great of an event.

On later turns, you can headline Suez as a pseudo-De Gaulle or Socialist Governments.  You can follow up a Suez Crisis headline with any number of plays: taking over France, playing Special Relationship without triggering it, or scoring Europe on undeservedly advantageous terms.  It is otherwise just a 3 Ops card.

As US

This is rarely a problem card, even if you are under Red Scare.  Although it removes 4 influence and you only have 3 Ops to repair the damage, 3 Ops are usually more than enough to restore the important influence:

  • Israel is no big deal, so long as you expand out of Israel first.  Since you probably aren’t interested in taking Israel in the Early War, the only threat is losing access in the Middle East.
  • The UK is relevant only for European domination and Special Relationship.  (Suez Crisis is in fact the main reason you’d ever lose influence in the UK.)  Accordingly I will stick a Marshall Plan influence into the UK, and if I sense that Special Relationship will be triggered I will try to recontrol the UK eventually.  But otherwise you can safely ignore the loss of influence in the UK until you have Ops to spare.
  • France is hopefully empty when you play this card.  If it isn’t, since the other countries are not that important, you can use the 3 Ops of this card to repair the 2-influence damage done in France.

Depending on the situation, Suez Crisis may sometimes be an empty Action Round, but even if it is I will always play it for Ops rather then sending it to Space.  Being able to get it out of the deck is much preferable to allowing the USSR the possibility of headline shenanigans.

Posted in Early War, USSR Events | Tagged | 4 Comments

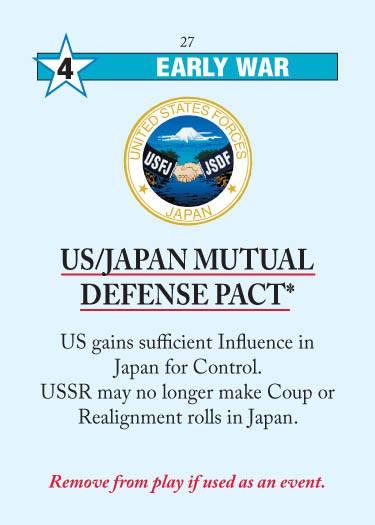
US/Japan Mutual Defense Pact

US/Japan Mutual Defense PactUS/Japan Mutual Defense Pact

1951

On September 8th the United States quietly extended its nuclear umbrella to its former Pacific rival. In doing so, it also soothed the nerves of Japan’s neighbors about a remilitarized Japan appearing on the world scene. In exchange, Japan played host to America’s forward presence in Asia. Japan effectively became an unsinkable aircraft carrier for both the Vietnam and Korean wars. Obviously, US reliance on Japanese products during the ensuing conflicts greatly aided Japan’s economic recovery and eventual economic might.

Time: Early War
Side: US
Ops: 4
Removed after event: Yes

As USSR

It doesn’t take very long for a USSR player to learn that Japan is not a very communist-friendly country.  Given that you’ll never get Japan anyway, this card is usually just a free 4 Ops card, though it can be rather annoying if you’re trying to use those 4 Ops to take over some other Asia battleground!  Of course, if the US has already taken Japan for some reason, then it is a truly free 4 Ops card because you were never going to coup or realign Japan anyway.

The two interactions worth noting: if you have Asia Scoring/Korean War (or know that Asia Scoring/Korean War is going to be triggered this turn), it is obviously to your advantage to hold onto US/Japan until after those are played.  I have had situations where the US player is forced to score a Asia Domination for me on his final Action Round because he thought I would play US/Japan for him.

There is one situation where you might try to defy the Defense Pact: if US/Japan is discarded on Turn 3, Asia Scoring has yet to come out, and Japan remains at 1/0, it may be worthwhile to steal a Asia Domination by taking Japan with the China card.  After all, if Japan gets you Domination (or denies it to the US), then it’s worth a total of 6VP (4 for Domination, 1 for battleground, and 1 for adjacency).  There’s about a 50/50 chance that you’ll lose it all when US/Japan comes back out somewhere in Turns 7-10, but 6VP is a pretty big chunk of VP…

As a footnote, if you’re teaching the game to a new USSR player, you should absolutely advise him of the existence of this card, lest he be forced this lesson the hard way like so many other Soviet Premiers (including yours truly).

As US

Unless the USSR has actually taken over Japan—a very rare occurrence—this is never worth playing for the event.  Even if you need Japan, you can just play it for Ops and put 3 into Japan and 1 somewhere else.  And if you don’t need Japan, you can usually just play it for Ops elsewhere, content in the knowledge that most USSR players won’t ever dare play into Japan.

On Turns 1-2, the Ops are probably more important elsewhere than Japan.  But on Turn 3 you should use 3 of the Ops to take Japan and 1 Op elsewhere, to prevent the play described above.  All in all, it is a card you’d much rather have in the USSR hand.  Depending on where Asia Scoring is in the deck, though, you can’t just wait for US/Japan forever: if US control of Japan is what determines Domination, it is better to waste 3 Ops than lose 5VP…

Posted in Early War, US Events | Tagged | 8 Comments

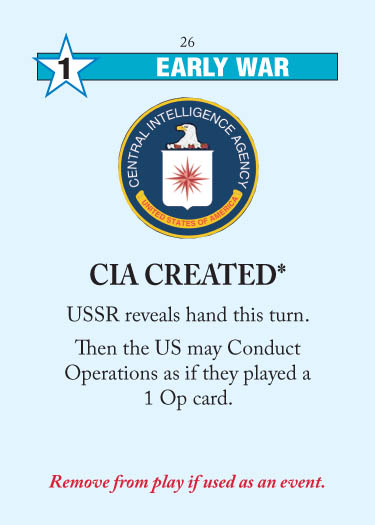
CIA Created

CIA CreatedCIA Created

1947

In an effort to bring to a close the inter-service bickering that marred U.S. intelligence during WWII, President Truman created the United States’ first independent agency capable both of intelligence analysis and covert operations. Its 40 year cat-and-mouse game with its Soviet counterpart, the KGB, would be the stuff of legend, and one of the hallmarks of the Cold War.

Time: Early War
Side: US
Ops: 1
Removed after event: Yes

As USSR

As a DEFCON suicide card, this card is a problem.  Because it allows the US to conduct Operations on your turn, if DEFCON is 2, then the US can coup a battleground (specifically, a Mid War region battleground due to DEFCON restrictions) to lower DEFCON to 1 and lose you the game.

The only easy way to get rid of this card is in the Early War, if you are fortunate enough to draw it before you have influence in a Mid War battleground.  Then you can play it whenever you want (preferably as the last card in your hand, but if you delay too long the US may play Fidel!), and even at DEFCON 2 it won’t cost you the game.

If you draw it and you do have influence in a Mid War battleground, well, then you’ve not got a lot of good options.  You can play it on AR1 if DEFCON is still 3, allowing the US the coup and revealing your whole hand.  You can take advantage of Nuclear Subs to get out of it, since then the CIA Created coup won’t lose you the game.  You can space it if you are under Brezhnev Doctrine.  You can play it with UN Intervention, but then you can’t hold a card to next turn, and you might need to do that if you’re dealing with other bad US cards.

Unlike Lone Gunman, I do not usually hold this turn to turn, waiting for a better chance to discard it.  I usually just play it on AR1, because there are too many things that can cause me to discard a card from my hand, which would lose me the game if I don’t have the China card.

As US

Because of how bad it is for the Soviets to draw this, I always play this for Operations before the Turn 3 reshuffle.

In the Mid War, between Turns 3 and 6, there’s still a chance the USSR will draw it if I play CIA for Operations.  So I’ll usually play it for Ops.  But if I have literally no other headline choice, or if I desperately need to conduct some Ops / drop DEFCON in the headline, then CIA is a good choice for the headline.

If I draw it on Turn 7, though, then the USSR isn’t ever going to draw it, and playing it for the event is strictly superior to playing it for Ops.  I will usually headline it (though there are tons of great US headlines at this point).

This card means that I’m willing to trigger Fidel on Turns 1 or 2 because it’ll make CIA unplayable if they draw it.  On Turn 3 I’ll probably space it unless I know the USSR is still holding on to CIA and has no other influence in the Mid War regions.

Posted in Early War, US Events | Tagged | 50 Comments

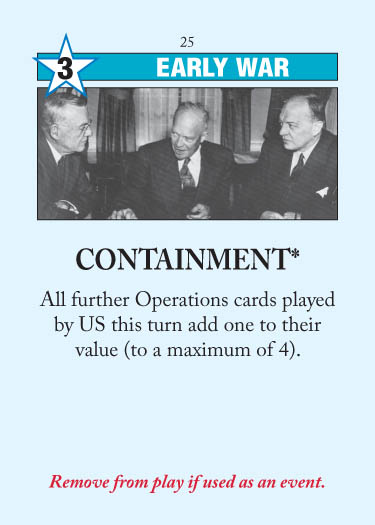
Containment

ContainmentContainment

1947

A term coined by diplomat and Sovietologist George Kennan, it came to form the cornerstone of US policy toward the Soviet Union during the early Cold War. It found early application in the Truman Doctrine and sought to “contain” Communism to those areas where it already existed.

Time: Early War
Side: US
Ops: 3
Removed after event: Yes

As USSR

Play it on the last Action Round.  This is not worth holding between turns, unless you know for a fact that the US is holding Lone Gunman (which shouldn’t happen, as someone should trigger Containment in the Early War), and definitely not worth sending to space, which can actually end up making it hurt worse if the US draws it and headlines it.

As US

One of the four great US headlines in the Early War, along with Red Scare/Purge, Defectors, and Marshall Plan.  Unless I have a hand full of 4 Ops and scoring cards, I almost always try to headline Containment, because if I play it for Ops the USSR could draw it and then it would be almost worthless.  And even if my hand doesn’t benefit much from Containment, I will simply hold it to next turn and headline it then.

Somewhat ironically, with Containment the US can expand much more aggressively than usual in the Early War.  With a Turn 1 Containment headline, it is actually possible for the US to exit the Early War firmly ahead in both position and VPs (or even with an autovictory) given fortunate rolls and draws.

Containment is slightly better than Brezhnev Doctrine for two reasons: one, it comes out earlier, and two, even if the USSR plays it on the last Action Round, it will still have an effect.  On Turn 3, if I have not yet seen Containment, then I know the USSR is holding it to the last Action Round, and so I will make sure that my last play can take advantage of it.  It would be a waste to play a 4 Ops or a scoring card only to see it “boosted” with Containment.

Posted in Early War, US Events | Tagged | 4 Comments

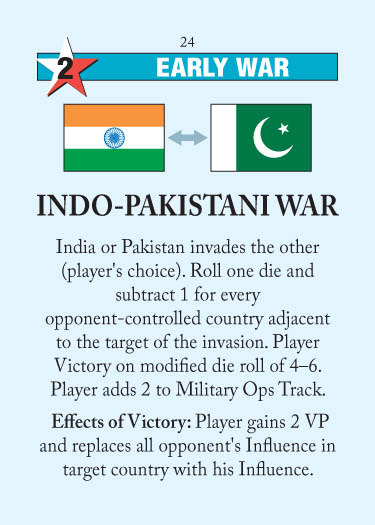
Indo-Pakistani War

Indo-Pakistani WarIndo-Pakistani War

1947–48, 1965, 1971

From the time of India’s independence from Britain, the Muslim and Hindu elements of this former colony have been in conflict. Pakistan has traditionally been on the losing end of these conflicts, but has relied on US and PRC support to maintain military credibility against a more robust Indian defense capability.

Time: Early War
Side: Neutral
Ops: 2
Removed after event: No

A huge threat in the early game: this is one of those cards that always seems to work for your opponent, but never yourself.  (See also Brush War.)  Like Truman Doctrine/Warsaw Pact, the deterrent threat of the Indo-Pakistani War is perhaps the strongest aspect of the card, and makes Afghanistan considerably more attractive (not that it wasn’t attractive already: it borders the USSR, it’s the easiest non-battleground for the USSR to grab for Domination, and the US can use it to block the USSR from Pakistan as well as the +1VP).

Usually you’ll just have to chance the roll while moving east from Iran: shoring up both Afghanistan and Iran before going into Pakistan is not a bad idea, but still leaves you with a 1/6 possibility of disaster.  India is even more perilous: it’s a huge pain to get to Burma first and then get India, and even if you lock down the whole region, India is never safe (unlike Pakistan).  It’s usually therefore a good idea to contest Burma a little in the Early War: not only is it 1VP when Southeast Asia Scoring comes out, but it also increases the chance that you can steal India.

The other big threat of the War isn’t even the loss of the country; it’s the loss of access.  If you play into Pakistan and control it, losing the Indo-Pakistani War will also cut you off from India.  So if you’re very concerned about the Indo-Pakistani War, you can play a single influence into Pakistan first.  This way even if you lose the War, you can still take over Pakistan.  Your opponent will be able to play into India first and likely take it over, but it’s better than losing Pakistan and being blocked out of India.

The US will tend to play Indo-Pakistani War more than the USSR in the Early War.  This is for two reasons: one, the USSR is more likely to be in Pakistan/India than the US, and two, the US has a more difficult time collecting Military Operations.  Indo-Pakistani War is therefore tantamount to at least +2VP (or possibly +4VP) when no other source of Military Operations is available.  Of course, Early War Ops are precious, but 2VP for 2Ops is quite tempting, and the possibility of another 2VP and a crucial battleground makes it even sweeter.

As USSR, drawing Indo-Pakistani War makes life a whole lot easier.  It means you can spread directly east in a straight line without having to detour into Afghanistan.  This means you make it much farther into Southeast Asia than you otherwise would if you had to stop to defend against a possible Indo-Pakistani War.  (This is true of US as well, but US is usually just grateful enough for even the opportunity to play into Pakistan.)

After the Early War, the region is usually sufficiently locked down that the Indo-Pakistani War has little chance of changing anything, and you can usually get the Military Operations elsewhere.  But in the event of some sudden change in the region (e.g., Brush War, Ussuri River Skirmish), the Indo-Pakistani War can be an ace in the hole: if the US can somehow flip Pakistan, India is suddenly looking a lot more vulnerable.

Posted in Early War, Neutral Events | Tagged | 6 Comments