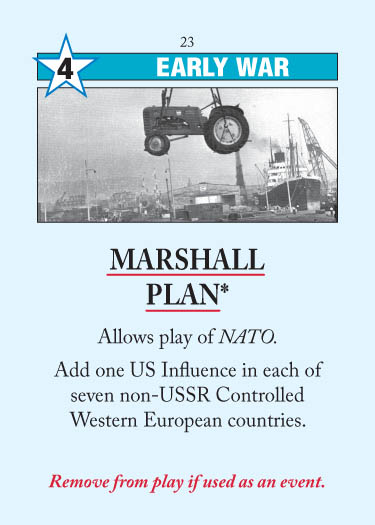
Marshall Plan

Marshall PlanMarshall Plan

1947

On June 5, Secretary of State George C. Marshall announced to the world the US plan to reconstruct all of Europe. Due to Soviet pressure, Eastern European states did not participate. However, for the 16 nations of Western Europe that did, the Marshall Plan marked the first step on the road to recovery and ultimate victory in the Cold War.

Time: Early War
Side: US
Ops: 4
Removed after event: Yes

As USSR

One of the most problematic US cards in the Early War.  No event places more influence on the board than Marshall Plan.  The best way to defuse this card is by controlling the important countries beforehand: if you’re able to sew up the 2-stability countries before it is triggered, then Marshall Plan influence gets mostly sent to unimportant countries.  At the very least, you want to use the 4 Ops of this card to control Greece or Turkey before triggering the event, lest you turn all of Europe blue.

Another option is to send Marshall Plan to space.  This is more plausible when you’re under Red Purge and therefore cannot control two of the Mediterranean countries with the card’s Ops.  Even if you aren’t, it’s sometimes worthwhile to sacrifice the 4 Ops of Marshall Plan: you’ll have to find the Ops eventually to play into Europe, but there are definitely situations where you’re better off in Europe without the poisoned 4 Ops of Marshall Plan.

The best way of playing Marshall Plan is with UN Intervention, which gets you the best of both worlds.  It is in fact probably the best Early War USSR candidate for UN Intervention, along with CIA Created (if you have influence in a Mid War region).

Ideally, you’d like to play Marshall Plan as late as possible so that the US can waste most of its effect.  If you can bait the US into controlling Canada before Marshall Plan, for instance, before playing Marshall Plan, you’ve effectively wasted a US Operations point.  In particular, if you do space Marshall Plan (or UN Intervention it), then it’s a pretty painless 4 Ops in the Mid War.

It goes without saying that if you also have NATO in your hand, you should play NATO first, before Marshall Plan (and before the US can trigger Warsaw Pact Formed).

As US

This is best as a Turn 1 Headline, because you can adjust your opening setup to take advantage of it.  As the game goes on, it gets worse and worse because as countries are controlled, the influence becomes less and less helpful.  But it remains very powerful even if played in an Action Round; if you can get Marshall into the 2-stability Mediterranean countries on Turn 1 or 2, you probably won’t ever be dominated in Europe (and conversely you can assure Domination if you get France).

This is therefore the only starred US event in the Early War that I will almost always play for the event, because it is too risky to let this get into the reshuffle. If it comes back on Turn 3, it might still do some good, but if it comes back any later it probably won’t accomplish anything. Of course, there will be times when you don’t need Marshall Plan for European domination and/or desperately need the 4 Ops elsewhere, and in those situations you should feel free to let it go. But in general, Marshall Plan is the rare starred event that gets worse and worse as the game goes on.

On the flip side, be careful you don’t rush too quickly into Europe, as otherwise the effect of Marshall Plan will mostly be wasted.  Of course, there is always a sense of urgency in Twilight Struggle, and Marshall’s influence is even more wasted if you let the USSR take all the Mediterranean countries first.  But for example, if the UK is hit with Suez Crisis, there’s no need to patch it back up to 5 immediately as you may as well wait for the Marshall Plan influence.

The countries I target with Marshall Plan, in descending priority:

  • Spain/Portugal, Greece, Turkey
  • Italy, West Germany
  • Canada (if I don’t already control it), UK (even if I already control it, if Suez Crisis hasn’t come out)
  • France (only if I already control it or if I plan to play into it this turn, but not if I’m using De Gaulle or Suez Crisis)
  • Benelux, Denmark
Posted in Early War, US Events | Tagged | 10 Comments

General Strategy: The AR7 Play

Action Round trackOverview

The “AR7 Play” refers to any US play on the final Action Round of the turn (AR6 on Turns 1-3, AR7 thereafter) intended to overload the USSR’s first Action Round in the next turn.  The AR7 play is the cornerstone of advanced American strategy and one of the main ways to seize initiative from the USSR.

The key to the AR7 play lies in DEFCON.  At the beginning of most turns, DEFCON will rise to 3, and so each turn the USSR would like to coup a battleground on AR1 in order to drop DEFCON to 2 and block the US from battleground coups. The AR7 play therefore attempts to create a crisis for the USSR that cannot be addressed until AR1 of the next turn.  By timing this crisis to arrive simultaneously with the USSR’s DEFCON obligation, the US hopes to overload the USSR’s AR1, and force the USSR into one of two unpalatable choices: either address the AR7 crisis (and give the US the battleground coup) or drop DEFCON (and allow the US to capitalize on its AR7 play).

There are three types of AR7 plays: breaking USSR control, playing into a non-battleground, and managing bad USSR events.

1. Breaking USSR control of a country

This is the most common AR7 play.  You place influence into a USSR-controlled country (let’s say Pakistan), enough to break control.  On AR1 of next turn, the USSR must either restore its control of Pakistan (allowing you to coup a battleground) or coup a battleground (allowing you to play a high Ops card into Pakistan to flip the country to capitalism).  Either way, you end up sacrificing very little to gain something significant.

Ideally, you want to break control of a country that is not coupable at DEFCON 3.  For instance, if you broke USSR control of Nigeria, the USSR could just coup Nigeria on AR1 and kill both birds with one stone.

However, it may still be worthwhile to break control of a Mid War battleground if you have an obviously desirable battleground coup target.  For instance, if you hold South Africa, Angola, Botswana, and Zaire to the USSR’s Algeria, Nigeria, and Zimbabwe (and therefore have African domination), the USSR is almost certainly going to coup Zaire on AR1 to gain Domination.  However, if you use your final AR play on Algeria, then the USSR is no longer able to flip Domination with a single play.  Regardless of which country he coups, you’ll be able to maintain the 3-2 battleground split.

The most flexible way of making this AR7 play is with Operations, but there are many events that accomplish something similar: John Paul II Elected Pope, Panama Canal Returned, OAS Founded, etc.  These are all events that benefit from being played on the last Action Round of a turn because they are otherwise easy to respond to.

Breaking control on the final AR is most effective when it disrupts the scoring situation in the region — for example, turning USSR Domination into Presence or US Presence into Domination.  It presents a much more critical crisis for the USSR, and in addition, the US is able to threaten headlining the scoring card (which may in turn force a suboptimal USSR headline in response).

2. Playing into non-battleground countries

Sometimes you’ll find yourself needing a cheap non-battleground country.  Simply playing into it may just invite a back-and-forth coup war.  The AR7 play gives you an opportunity at at least one uninterrupted turn in that country, to exploit as necessary.

Colombia is a common example, since it is a cheap non-battleground that allows access to the lucrative South America region. But a US player that plays into Colombia, intending to move onto Venezuela, will soon find himself couped out by the USSR.  Worst case scenario, a strong USSR coup might mean this play actually lets the USSR into South America unopposed.

The better approach is to place an influence into Colombia as an AR7 play.  On the next turn, the USSR now faces a dilemma: coup a battleground country to drop DEFCON (thereby allowing the US to play into Venezuela), or coup Colombia to deny Venezuela access (thereby allowing the US to coup a battleground country).

However, it is important to note that if the USSR goes ahead and coups Colombia, the US now faces the same dilemma.  In other words, if the US is going to allow the USSR into South America, it needs strong compensation (a lucrative coup target, or saving an important US battleground from being couped) or little downside (for example, if the USSR is already in South America via De-Stalinization).

Another common approach is the use of non-battleground countries as realignment boosts.  Once Fidel takes over Cuba, most good USSR players will respond to US control of Nicaragua (relevant because of its Cuba realignment modifier) by couping the US out of the country.  But no USSR player is going to coup Nicaragua on AR1, and so therefore an AR7 play into Nicaragua usually assures at least one turn’s worth of realignment against Fidel at +1.

Finally, you may want a cheap non-battleground to threaten a quick Domination.  If you meet all other conditions for South America domination, but just need a non-battleground country, consider controlling Colombia with your AR7 play.  This creates headaches for the USSR: if he coups a battleground elsewhere, and you happen to have South America scoring, you’ll be able to score the Domination without the USSR contesting it by couping Colombia back and forth.

3. Disposing of bad USSR events

The last type of AR7 play is when you have a strong USSR event that you have no choice but to trigger.  For instance, De Gaulle while under Purge or Muslim Revolution both open up the board for the USSR and create opportunities for the USSR’s Ops.  If you had played them during the turn, then the USSR would be able to use his Ops in the next Action Round to take advantage. By playing such events as an AR7 play, however, you force that decision onto their AR1.  This doesn’t gain you anything, but it does help mitigate the effects.  Before, if you played a Red Scared De Gaulle, you would lose France.  Now, either you don’t lose France, or you do lose it but get a battleground coup as compensation.

Vietnam Revolts and Brezhnev Doctrine also sort of fit in here, since playing them on AR7 minimizes their impact, but those are a special case.

Headlines

Between the final AR and the first AR of the next turn comes the headline phase.  It is easy here for the AR7 play to fail.  The USSR can headline a direct counter to your play: maybe Decolonization (or other influence-dropping cards) wipes out all hopes you had of Africa domination.  Quagmire takes away your AR1 and gives the USSR two AR’s in a row.  Socialist Governments can remove the influence put in by the AR7 play.  A card like We Will Bury You drops DEFCON in the headline phase and earns VPs to boot, allowing the USSR to address your AR7 play on AR1.  In fact, any headline that discharges the USSR’s DEFCON obligation (Junta, Cuban Missile Crisis) nullifies the point of the AR7 play.

The US can even interfere with its own plan.  Suppose you headline Grain Sales to Soviets, take a card from the USSR, and use it to coup.  Well, that’s good, but now you’ve nullified your own AR7 play.  Not that you shouldn’t still headline Grain Sales (probably the best card in the game for the US), but you may want to consider holding it to next turn’s headline where it won’t interfere with your AR7 play.  Worst of all would be headlining something like Cuban Missile Crisis, needlessly dropping DEFCON and freely taking the dilemma off of the USSR’s hands.

On the other hand, the US headline can accentuate and compound the AR7 crisis.  Truman Doctrine is the best example of this: an AR7 play into France, breaking USSR control, is normally not that effective, because if the USSR ignores it and coups, you ordinarily don’t have enough Ops to flip France in a single play.  But a Truman Doctrine headline that eliminates USSR influence in France makes your AR7 play much stronger and much less ignorable.  It is a variant on the typical USSR headline-AR1 combo.

USSR counters on AR1

Outside of headline counters (described above), there are a few other counters to this tactic.  Duck & Cover is the canonical example: it trades 3VP for the ability to lower DEFCON while placing influence.  It is the all-around best response by the USSR.  As an alternative, Junta might be able to accomplish something similar, and ABM Treaty in your hand at least lets you coup back whatever the US coups.

However, if the USSR is unable to respond in the headline, it will usually just be forced to choose between responding to the AR7 play and lowering DEFCON.  It is of course impossible to give an all-around answer as to how to respond to all AR7 plays; generally, however, it is my experience that forgoing the battleground coup is the safer approach, but depending on where the US will coup you and what scoring cards are yet to come, you may simply have to take your chances on the coup instead.

Turn 10

Turn 10 is a special case, as it is the very last play of the game.  The US AR7 play on Turn 10 is far more devious: it involves manipulating Final Scoring thanks to your last play advantage. For example, most USSR players are lazy about Middle East domination and rely solely on Syria for their non-battleground.  A Turn 10 AR7 play into Syria, breaking USSR control, can therefore cost the USSR Middle East domination.

The Voice of America is the absolute best way of accomplishing this: a choice removal of several important influence can deny Domination, grant yourself Domination, or even deny the USSR Presence in multiple regions at once.  Barring that, a high-Ops card held until AR7 can accomplish much the same thing if you are able to break USSR control of a few key countries. Suppose the USSR controls Mexico / Cuba / Nicaragua, and you control Panama / Costa Rica.  With a 4 Ops, you can break the USSR control of both Mexico and Cuba, flipping Domination and earning you a total of 8VP!

Other events that can help include any event that gives you a lot of influence (Ussuri River Skirmish, Colonial Rearguards, OAS Founded) or North Sea Oil.

As USSR, the best way to defend against the Turn 10 AR7 play is to end the game before Final Scoring.  Barring that, Turn 10 is usually a very defensive turn for you, as you have no choice but to shore up all your important battlegrounds / non-battlegrounds.  Quagmire, if you are fortunate enough to draw it on Turn 10, is a great AR7 play by forcing the US player to waste their AR7 discarding to Quagmire instead of accomplishing something useful.

Posted in General Strategy | 11 Comments

Independent Reds

Independent RedsIndependent Reds

1948

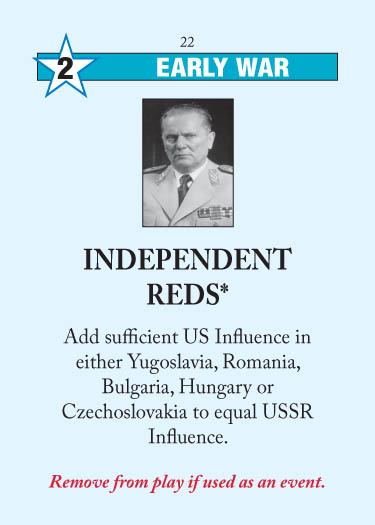
The Communist Information Bureau, COMINFORM, expelled Yugoslavia for Marshall Tito’s refusal to conform to Moscow’s wishes. Albania would ultimately follow a similar tack, breaking with Yugoslavia, then Khrushchev’s USSR. While remaining within the Soviet structure, Ceausescu’s Romania would also test the limits of Moscow’s patience with occasional flares of independence and nationalism.

Time: Early War
Side: US
Ops: 2
Removed after event: Yes

As USSR

Not a dangerous card by itself, but it has mildly concerning interactions with the other cards that affect Eastern Europe.  You generally want to play Independent Reds as soon as you can, before the US plays Warsaw Pact Formed, Comecon, or Romanian Abdication to force some USSR influence into Eastern Europe.  On the other hand, if you drew Truman Doctrine with Independent Reds, you probably want to get rid of Truman first, before Independent Reds.

Regardless, Independent Reds is usually not worth bothering over.  You need every Op you can get in the Early War, and Eastern Europe is too expensive to fight over in the Early War anyway.  Romania is the most troublesome, since if you play Independent Reds after Romanian Abdication, the US can play Truman Doctrine to score an additional 1VP on Europe Scoring.  Even then, Independent Reds is probably not worth sending to space.

As US

One of those events that the owner of the event isn’t that interested in triggering. For a US player, it’s usually not worth an Action Round, though if you’re in a tight battle for European domination it can be a cheap way to cut the USSR’s country count.  But Independent Reds does have an impact on US play: it’s the opposite of the above, namely, that you want to trigger Warsaw Pact Formed, Comecon, and Romanian Abdication as soon as you can so that Independent Reds isn’t totally useless.

Posted in Early War, US Events | Tagged | 4 Comments

NATO

NATO

1949

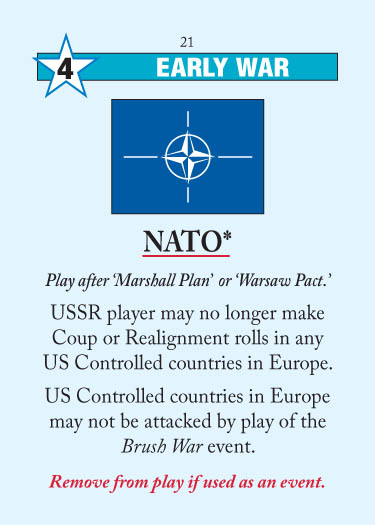
The second part of the US strategy to rebuild Europe, the North Atlantic Treaty Organization (NATO) became synonymous with the West’s opposition to the Soviet Union. An oft repeated maxim for NATO’s purpose captures it nicely: “NATO was created to keep the Soviets out, the Americans in, and the Germans down.”

Time: Early War
Side: US
Ops: 4
Removed after event: Yes

As USSR

NATO is a pretty terrible event and therefore a great card to draw, given the scarcity of 4 Ops in the Early War.  It’s especially nice to play as soon as possible, before Marshall Plan / Warsaw Pact are triggered, but even if you trigger the NATO event it’s still a nearly-free 4 Ops.

If you do draw it after Warsaw Pact / Marshall Plan has been activated, then you should make sure you don’t plan to Brush War Italy or play Special Relationship before playing NATO.

As US

I have never played this card for the event as the US.  The coup/realignment restrictions are pointless because DEFCON restrictions already prevent nearly all coups and realignments in Europe.  Brush War immunity against Italy is sometimes nice, but most of the time you should have Spain / Greece / France anyway, which provide de facto Brush War immunity.

NATO’s only real impact comes with Special Relationship in the Optional Cards, because it gives Special Relationship a substantial boost.  Even that, though, is still not worth giving up the 4 Ops.

What this really means is that you should try to play Warsaw Pact or Marshall Plan as soon as you can in the turn, so that the USSR cannot simply play NATO with impunity.  They’ll still play it, of course, but at least they’ll give you the Special Relationship boost for it.

Posted in Early War, US Events | Tagged | 24 Comments

Olympic Games

Olympic GamesOlympic Games

1948, 1952, 1956, 1960, 1964, 1968, 1972, 1976, 1980, 1984, 1988

Sport often served as an outlet for the intense competition between the Superpowers, and that competition was never so intense as at the Olympics. The Olympics served as a test bed to see which society could make the greatest strides in human physical achievement. It fit neatly into Communist ideology of “the New Man.” The games frequently reflected the global political situation, as with the terrorist attacks in Munich, and became overt political tools with the US boycott of the Moscow games in 1980, and the Soviet boycott of the LA games in 1984.

Time: Early War
Side: Neutral
Ops: 2
Removed after event: No

You can’t play Olympic Games for the event when DEFCON is at 2, because your opponent will boycott and you will lose on DEFCON.  Once you realize that, there’s not much else to see: if you play it when DEFCON is greater than 2, no sane opponent would ever boycott, and so you’re basically playing a 2Ops card for an average of 1.25VP.  Not a good trade in most circumstances, and in any event, if DEFCON is greater than 2, you should have much greater priorities than hosting the Olympics.

About its only use is as a headline (albeit a rather risky and ineffective one) if you have nothing else to headline, or when you’re truly desperate for VPs.  Remember that an Olympic Games headline can cause you to lose the game if your opponent also degrades DEFCON in the headline!

A pedantic footnote: in the Deluxe Edition, the wording of the card’s boycott clause was slightly changed.  The new wording (“as if they played a 4 Ops card” instead of “with 4 Operations points”) means that a Olympic Games boycott is now subject to Red Scare/Purge.  Not that it ever matters, but it helps clarify the boundaries of Red Scare/Purge, which is often the subject of rules questions.

Posted in Early War, Neutral Events | Tagged | 16 Comments

General Strategy: The Space Race

The number one mistake beginning players make in Twilight Struggle is to send too many cards off to space.  Among strong players, you rarely see either player make it to Stage 4 (Man in Earth Orbit in the Deluxe Edition, Man in Space in the First/Second Editions) where they can see the opponent’s headline first, and it is especially rare to see any progress beyond that.

The reason for this is that Ops are paramount.  An Action Round spent on the Space Race is an Action Round that you aren’t putting pressure on your opponent or countering his threats.  However much your opponent’s event might sting, it is often more important to get the Ops you need in the regions that you want it, and on this very Action instead of waiting a round.

This is especially true if you are holding your opponent’s starred events: if the event can only happen once, you would usually rather control how it is triggered and mitigate its effect immediately, instead of potentially letting your opponent trigger it later at a much more inconvenient time.

As discussed earlier, the real job of the Space Race is to discard truly awful opponent events that you cannot mitigate in any meaningful way.  In this context, “truly awful” means:

  • cards that will immediately lose you the game (e.g., DEFCON suicide cards)
  • cards that provide your opponent access to a region (e.g., De-Stalinization)
  • cards that remove your access to a region (e.g., Voice of America)
  • cards whose Ops value is not enough to repair its damage (e.g., Ussuri River Skirmish)
  • cards that give your opponent multiple plays in a row (e.g., Quagmire/Bear Trap)
  • cards that give your opponent lots of VPs (e.g., OPEC)

If you have none of these “truly irreparable” cards to space, then you can also consider spacing:

  • cards that are empty action rounds for you: i.e., you spend your action round repairing whatever damage the event causes (e.g., Socialist Governments)

The Space Race’s VPs are usually not a big deal.  They tend to matter more to the USSR, who is usually disadvantaged in Final Scoring and would like to end the game in the Early/Mid War or a Turn 8 Wargames.  On the other hand, the USSR is much more vulnerable to Space Race success: a USSR player that makes it to Stage 4 too quickly can no longer space 2 Ops cards, and there are enough bad US 2 Ops events that getting to Stage 4 too early can be a serious liability.

The Space Race’s special text is slightly more interesting: the space-two-cards perk is nice if you are holding multiple bad cards, and seeing your opponent’s headline is of course a powerful advantage.  In addition, Star Wars helps keeps some interest in the Space Race towards the Late War, as the ability to play any card in the discard (as opposed to just draw, like with SALT Negotiations) is exceedingly powerful.

As USSR

These are the US events that I tend to Space Race. The top priority is obviously DEFCON suicide cards:

Title Reasoning
CIA Created* Only possible under Brezhnev Doctrine. Not much of a problem if DEFCON is at 3 or higher, or if you have no influence in a Mid War battleground.
Grain Sales to Soviets The handsize reduction means this is probably unplayably bad even at DEFCON 3 or higher.
Soviets Shoot Down KAL-007* Not at all a problem if DEFCON is high. If necessary, you can get around the South Korea problem by using the 4 Ops to break US control of South Korea.
Star Wars* If behind on the Space Race. Even if it doesn’t lead to DEFCON suicide, it’s usually too strong to allow to trigger.
Tear Down This Wall* Even if DEFCON isn’t at 2, this is still just absolutely brutal for the USSR.

As for non-DEFCON suicide cards:

Title Reasoning
East European Unrest Only in the Late War is it truly a problem; in the Early War it’s an empty Action Round at best, though if you overprotect East Germany and Poland it doesn’t even have to be.
Five Year Plan Heavily depends on what else is in my hand, but if it would trigger one of these other cards, especially a DEFCON suicide card, then it’s just as deadly.
NORAD* If I have a luxury of Ops on Turn 3, then I will space it. On Turns 1 or 2 I will probably play it for Ops.
Special Relationship Only if NATO is in effect and the US controls the UK.
Alliance for Progress* Once it scores high enough for the US.
Bear Trap* Because playing it on yourself is too painful.
Colonial Rear Guards Unless you were in a truly dominant position in Africa, 2 Ops is just not enough to counter its effects.
John Paul II Elected Pope* Its own event is bad enough, but it also enables Solidarity later on. If you’re desperate, though, you can trigger this if you know Warsaw Pact is still in the deck.
Our Man in Tehran* I would very much like to space this, but find that I usually can’t spare the Ops.  Occasionally you can use it to break control of the only US country in the Middle East.
Puppet Governments* Definitely a Space Race on Turn 4; by Turn 7, it’s usually worthless.
The Voice of America No real way to mitigate this.  Early in the Mid War, it will kill your access; late in the Mid War, the US player will have too many options.
Ussuri River Skirmish* Especially when the US has a face-up China Card, though I’m tempted to do so regardless of the China Card’s status.
AWACS Sales to Saudis* Can be nice to keep around if Muslim Revolution is still in the draw deck.  Very low on the priority list of things to go to space, though.
Solidarity* Only if John Paul II is in effect and if I can’t count on Warsaw Pact.

As US

These are the USSR events that I tend to Space Race.  Again, the top priority is obviously DEFCON suicide cards:

Title Reasoning
Lone Gunman Only possible under Containment. Not much of a problem if DEFCON is at 3 or higher.
We Will Bury You Playable at DEFCON 3 or higher, but the VP penalty is harsh.
Ortega Elected in Nicaragua Only if I have influence in Cuba.

And the non-DEFCON cards:

Title Reasoning
Decolonization Doubly harsh in the Early War because of the access it provides to the USSR. This is always a space race for the US, but in the Early War I try to hold it to Turn 3 before spacing it to keep it out of the Turn 3 reshuffle.
De-Stalinization* Game-changingly powerful because of the access it provides to the USSR. In the Early War I try to hold it to Turn 3 before spacing it to keep it out of the Turn 3 reshuffle. By Turn 7 or so this event is probably useless and can be used for Ops instead.
Fidel* Only if I see him on Turn 3 or later, and have a luxury of Ops.
Socialist Governments Only because it is otherwise an empty Action Round anyway.
Liberation Theology 2 Ops is not enough to counter 3 influence and the critical access provided.
Muslim Revolution Only if the damage is too severe and irreparable. Not a big deal if you can recontrol Libya / Egypt; a much bigger problem if you lose Iraq / Saudi Arabia.
OPEC Depending how many VPs it scores. It usually scores a lot.
Quagmire* Because playing it on yourself is too painful.
South African Unrest The damage is not hard to repair, but it’s harmful enough that there’s no need to trigger it if you have nothing else you want to send to space.
Glasnost* Only if The Reformer has been played. Otherwise, it is a nice card for the US: an ABM Treaty you pay 2VP to use.
Iranian Hostage Crisis* Only if I control Iran and/or fear that Terrorism may be played against me.
The Reformer* An empty Action Round at best, but the fact that it activates Glasnost is good enough reason to conscript Mr. Gorbachev into NASA.
Posted in General Strategy | 25 Comments

Truman Doctrine

Truman DoctrineTruman Doctrine

1947

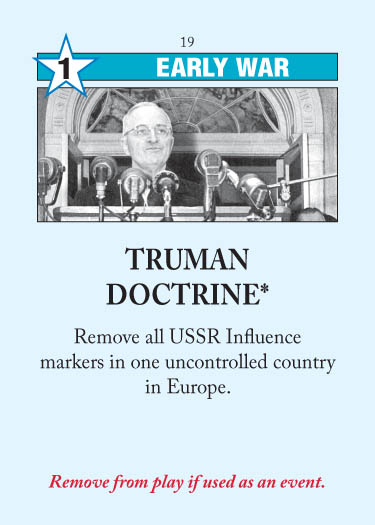
Before a joint session of Congress, the President announced the new Truman Doctrine, ushering in an era of intense intervention on behalf of states with liberal economic and political institutions. Truman stated “I believe that it must be the policy of the United States to support free peoples who are resisting attempted subjugation by armed minorities or by outside pressures.” The Truman Doctrine was prompted by the United Kingdom’s withdrawal from its traditional great power role in the Near East. The immediate effect of the doctrine was a massive influx of military and economic aid to Greece and Turkey.

Time: Early War
Side: US
Ops: 1
Removed after event: Yes

As USSR

Experienced USSR players see Truman more as a deterrent than a threat.  You must be careful not to engage in an Ops war when you cannot account for its location: many a USSR player has overinvested into France only to see the President wipe out all of your hard work in one fell swoop.

If you draw Truman Doctrine, it’s not hard to dispose of.  Just make sure that you don’t have much influence in an uncontrolled country and it’s a null event.  If you have to get rid of an influence in Finland, oh well.  This becomes quite problematic after Independent Reds, when it will always have at least some impact, so try to get rid of Truman as soon as you possibly can.  Be thankful you drew it and not the US.

In rare circumstances where you cannot safely play Truman Doctrine, consider using Five Year Plan if you have it.  If you play Five Year Plan with only Truman Doctrine in your hand, you now have 3 Ops to deal with the President instead of just 1.

As US

After drawing Truman Doctrine, the US player should try to make something happen with it instead of holding onto it for later. This is because Truman Doctrine is nigh-useless in the USSR’s hands, and Truman is one of the few ways for the US to establish initiative in the Early War.  This normally means a AR7 play: break control of France, hold Truman Doctrine, and then headline it next turn.  (An example of this play: Annotated Game #1, Turn 2, AR6.)  It’s also possible (and much more rewarding) to pull this off against East Germany, but USSR players normally overprotect East Germany and make uncontrolling it much more difficult.

If you really can’t make anything happen with Truman, hope to draw it in the Late War.  Its power amplifies significantly when combined with all the other US Late War Europe events, so if you draw it with Chernobyl or Tear Down This Wall you can set off some real fireworks.

You can also engage in some Turn 1 shenanigans with Truman.  Against a USSR setup of 3 EGER / 3 POL / 4 FIN, place 1 influence into Finland and headline Truman to wipe out Finland.  Now De-Stalinization is pretty safe to play, since he has few good countries to move influence out of, and East European Unrest actually becomes relevant.  Ordinarily, though, the USSR won’t do such a rash opening setup, and in any event I prefer to hang onto Truman to try to do more damage with him elsewhere.

Posted in Early War, US Events | Tagged | 11 Comments

Captured Nazi Scientist

Captured Nazi ScientistCaptured Nazi Scientist

1945–1973

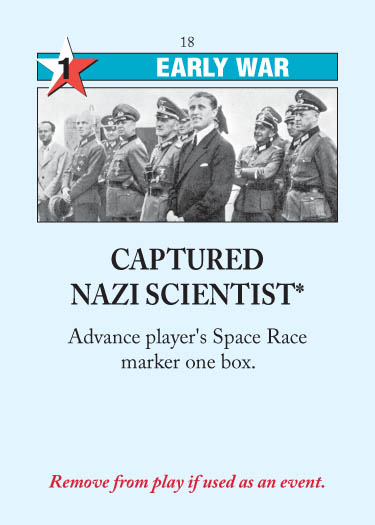
Code named “Project Paperclip” in the United States, the victors of World War II scrambled to “recruit” former Nazi scientists into their own research establishments. In the West, such efforts involved shielding scientists from war crime investigations. Perhaps the most famous case is Wernher von Braun who is thought of as the father of America’s rocketry program. Stalin was reportedly confounded by Soviet failure to grab this knowledge base first.

Time: Early War
Side: Neutral
Ops: 1
Removed after event: Yes

This is a nicely thematic card, though not that meaningful to the Cold War overall.  Assuming both players advance to at least the first spot on the Space Race, being first is a 2VP swing plus a little bit better chance at getting the other Space Race benefits.  1 Op for 2VPs is a pretty good trade (compare U2 Incident), but Ops and Action Rounds are a precious commodity in the Early War.  Even a single Op is often enough of an Action Round in the Early War, as there are many times when you just want to establish access (e.g., a US play into Malaysia).

More commonly, this is a good headline candidate if you have nothing better.  It’s a nice headline for USSR especially, if the threat of Defectors is still out there.

It does not take up your normal Space Race slot for the turn, so you should examine the probabilities on the board if you are going to use this and Space Race a card.  Obviously you would prefer to use this on one of the VP spaces that succeed on only 1-3 instead of 1-4.

Captured Nazi Scientist’s event becomes increasingly valuable if it survives to the Mid War.  In addition, if neither player has advanced much on the Space Race, it is helpful if you are desperate to space multiple cards.  Playing CNS and then spacing a problem card can accelerate you to Animal in Space with 2/3 probability, allowing to space one more problem card.

As always, there is the risk of advancing too far on the Space Race track.  This is more of a problem for the USSR: it’s nice to earn 2VPs and see the enemy headline first, but not so nice when you are unable to space Voice of America or Grain Sales to Soviets.

Posted in Early War, Neutral Events | Tagged | 7 Comments

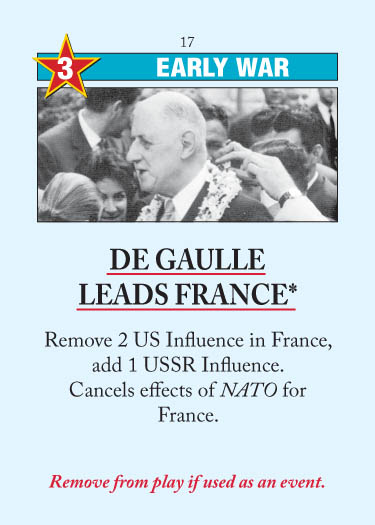
De Gaulle Leads France

De Gaulle Leads FranceDe Gaulle Leads France

1958–1969

Founder of France’s Fifth Republic, De Gaulle’s role during the Cold War is generally viewed through the lens of his second presidency. While still a western ally, De Gaulle attempted to establish France as an independent voice within the confines of the western camp. He developed an independent nuclear deterrent, withdrew from NATO’s unified command structure, and criticized US policy in Vietnam. He also pursued increased trade and cultural relations with the Soviet Bloc. He sought in all things to restore France to her former place of greatness in world affairs.

Time: Early War
Side: USSR
Ops: 3
Removed after event: Yes

As USSR

France is the key to Europe Scoring, and generally represents a 6VP swing for whoever takes it.  (Usually only one side can score the +4 for Domination, and the country itself is a 2VP swing.)  De Gaulle is the most powerful event at your disposal for taking over the country.

If you already control France, then there is obviously no need to play De Gaulle.  Keep him around in the deck just in case the US tries any funny business in France.

If the US controls France, then you should remember that De Gaulle’s overall effect is just 3 Ops.  If you play him for the event on an Action Round, the US can repair its effect with a 3 Ops card and you’ve gotten nowhere.  A better use of De Gaulle is to take advantage of your headline-AR1 back-to-back combo: headline De Gaulle, then play Ops into France to take over the country on AR1.  You give up the battleground coup, but it’s worth it to flip France your way.

If no one controls France, the best way to take France is by gaining access to it via West Germany/Italy/Algeria, and then using the 3 Ops of De Gaulle himself to just take the country directly.  This keeps De Gaulle in the deck.  If you can’t do this, then the headline-AR1 combo still works, but again, you’re giving up a battleground coup.

Regardless, keep an eye out for Algeria.  Even if the US triggers De Gaulle and then repairs the damage, you can at least grab a key African battleground.

As US

Regardless of the French situation, this is a great card to draw as the US.

If the USSR already controls France, that’s too bad, but then this card is a free 3 Ops, a rarity in the Early War.

If you already control France, then this is an empty Action Round, since you can repair De Gaulle’s damage with the 3 Ops.  (Note: spacing De Gaulle is not a great idea since you would rather dispose of him for no effect rather than allow him to come back and potentially hurt you more.)

And if France is empty, then you trigger the event and then pour the 3 Ops into France, making it 3/1.  The USSR is unable to control it with a single play, and thus may be wary of engaging in an Ops war if the threat of Truman Doctrine looms over his head.

The biggest concern with De Gaulle is that it allows the USSR access into Algeria.  Given the typical US Early War Ops scarcity, there’s not much you can do about this. If the USSR is distracted with other priorities, try to make sure that you take Algeria before he does.

De Gaulle becomes a serious liability if you are under Red Scare/Purge, because his Ops value no longer offsets the event.  If Purged, I would either try to hold De Gaulle until next turn, or simply accept that France is probably lost.  In such situations, it can be nice to play De Gaulle on your last Action Round, so that if the USSR wants to capitalize off of it, he at least has to do so during AR1, thus giving you a battleground coup.

Posted in Early War, USSR Events | Tagged | 15 Comments

Warsaw Pact Formed

Warsaw Pact FormedWarsaw Pact Formed

1955

A reaction to perceived Western aggression by the creation of NATO, the Warsaw Pact was a Russian-dominated military alliance that included all of the states of Eastern Europe except Yugoslavia. It integrated both tactics and equipment throughout the alliance along Soviet models. Albania withdrew from the Pact in 1968.

Time: Early War
Side: USSR
Ops: 3
Removed after event: Yes

As USSR

Being able to remove all US influence in Eastern Europe is vastly superior to adding 5 influence.  It is essentially Truman Doctrine at any time (regardless of control) and in four (Eastern European) countries at once.

Accordingly, I always play Warsaw Pact Formed for Ops in the Early War / Mid War so that I can keep it in the deck.  Its mere presence in the draw deck is a threat to the US, in much the same way that Truman Doctrine deters the USSR from engaging in European Ops wars. Warsaw Pact is your best (and sometimes only) defense against the Late War US onslaught of Chernobyl, Tear Down This Wall, East European Unrest, John Paul II Elected Pope, and Solidarity.

Once you get to Turn 7 and draw Warsaw Pact, it is then a common USSR hold card in case of European emergency.  Since any card played or discarded on Turn 7 or later is likely not going to return to the game, you must try to keep it in the game for as long as possible. As long the US player is convinced that the Warsaw Pact may yet be formed, he will be very hesitant about investing into Europe, thereby nullifying one of the great US advantages in the game.

In the unfortunate event that the US triggers Warsaw Pact Formed in the Early War or Mid War and there is no meaningful US influence to remove, I ordinarily bump East Germany and Poland by 2 each and stick the other influence in Yugoslavia or Czechoslovakia.  (Yugoslavia because I usually start with 1 there, and Czechoslovakia because it could theoretically provide a -1 against a Tear Down This Wall realignment of East Germany or Poland.)

As US

If you draw this in the Early War / Mid War, count your blessings.  As US, Warsaw Pact Formed is actually a better draw than most US events (like, say Five Year Plan).  Being able to get rid of a critical USSR Late War card is a huge bonus, and by playing it when you have no influence to be removed, you can save yourself a lot of worry and headaches in the Late War.

As an added bonus, an early play of Warsaw Pact Formed means the USSR can no longer dump NATO or Independent Reds with impunity.

Posted in Early War, USSR Events | Tagged | 12 Comments