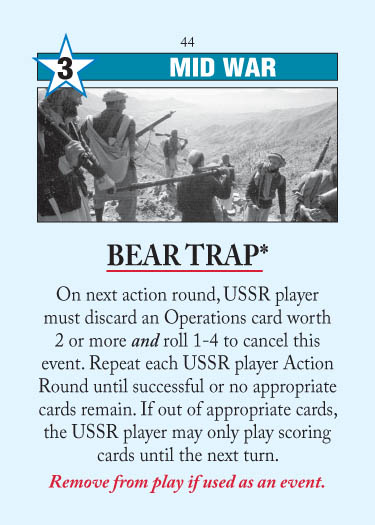
Bear Trap

Bear TrapBear Trap

1979 – 1992

In an era of seemingly increasing Soviet hubris, the USSR reverted to old patterns of power politics by meddling in the affairs of Afghanistan—the battleground country in the “Great Game” rivalry between imperialist Russia and Victorian Britain. The Soviets considered Afghanistan part of their natural sphere of influence. However, when Soviet troops directly intervened in an Afghan power struggle and deposed the existing president, they greatly miscalculated the reaction of world opinion. Smarting from defeat in Vietnam by seemingly inferior forces, the Reagan Administration sought to make Afghanistan into an equal nightmare. Over a ten year period, the United States provided over $2 billion in assistance to the Islamic resistance or mujahideen in Afghanistan.

Time: Mid War
Side: US
Ops: 3
Removed after event: Yes

As USSR

I almost always space Bear Trap.  Note the crucial difference between Bear Trapping yourself and being Bear Trapped: when the US Bear Traps you, you usually just get out on the first discard, and nothing of value was lost.  But when you Bear Trap yourself, you guarantee the US at least one set of back-to-back Actions, and possibly more.  (Note also that when you Bear Trap yourself, the US gets to know in advance when you will be emerging from the Bear Trap.)  There are simply too many things a strong US can do to you with a set of back-to-back Actions to risk self-Bear-Trapping.

There are exceptions however.  Sometimes you have too many problematic US events in hand and the Bear Trap discard is the only way to escape.  This is considerably more common than a US player needing to self-Quagmire, but still somewhat rare.  A better instance is when your last two cards are CIA Created and Bear Trap and you can’t hold a card; here, Bear Trapping yourself is the only way to avoid DEFCON suicide, because by skipping your Action Round with nothing to discard, you are “holding” CIA Created to next turn.

As US

Bear Trap has two main uses.

The first is to hope that the USSR rolls really poorly and gets stuck in the Bear Trap for an extended period of time.  If they fail their rolls, you get to conduct back-to-back Actions, one of the Holy Grails of Twilight Struggle.  The benefit of consecutive Actions is almost always immense: it can let you flip a battleground, get into an otherwise inaccessible region, set up a vital realignment, score a region undeservedly advantageously by temporarily breaking control, or a whole host of other possibilities.

Of course, the odds are against you.  If you play Bear Trap and they successfully discard and roll, then nothing has really been accomplished, except you gave up a nice US event and probably so did they.

The real point of this is when you can tilt the odds towards you with Red Scare/Purge.  Timed correctly, you can deprive your opponent of many Action Rounds in a row, and as a bonus, strand them with low Ops cards that they must hold in hand for next round.  For example, if you headline Red Scare/Purge, and then spring Bear Trap halfway through the turn, they might have no 3+ Ops events left.  In that case, not only can they not discard to Bear Trap and be forced to skip a whole bunch of Actions (allowing you carte blanche to take over the world), those low Ops cards stay in their hand through next turn as well.  (If you are really lucky or sadistic, you can use SALT Negotiations or the luck of the reshuffle to grab another copy of Red Scare/Purge to do it all over again next turn …)

The second is to time Bear Trap so as to force the USSR to skip a crucial round.  For example, you can play it as an AR7 play or headline, which causes the USSR to skip their AR1.  This is not really as nice as when the USSR headlines Quagmire on you, though.

In general Bear Trap is worse than Quagmire.  It doesn’t cancel NORAD, there are fewer “timing” opportunities for the US to play it, and there are more US events for the USSR to discard.  Accordingly, I usually hold Bear Trap as US until I draw it with Red Scare/Purge, or some kind of opportunity presents itself.  And if I still don’t have Red Scare/Purge by Turn 6 I will just play it for Ops, so the USSR at least has a chance of drawing it in the Turn 7 reshuffle.  Without Red Scare/Purge, you would much rather add this to the USSR headache list than play it yourself.

Posted in Mid War, US Events | Tagged | 20 Comments

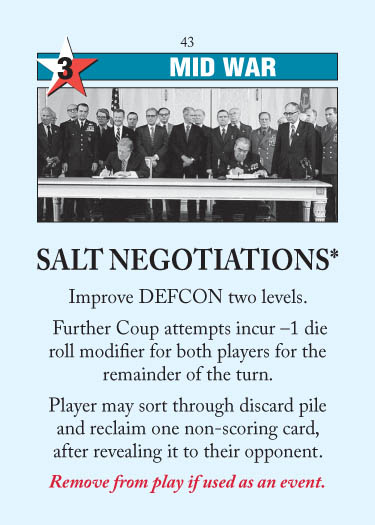
SALT Negotiations

SALT NegotiationsSALT Negotiations

1969, 1972

Initiated during the Johnson Administration, and completed by President Nixon and Secretary Brezhnev, the first Strategic Arms Limitations Talks (SALT) treaty essentially sought to limit the number of nuclear platforms, and restrict defensive systems that threatened the system of mutual deterrence. The success of this treaty led to the initiation of a second round of negotiations or SALT II. The diplomatic wrangling over this treaty began under President Nixon, and was completed in 1979 by President Carter and Secretary Brezhnev. SALT II provided broad limits on new strategic weapons platforms and banned mobile ICBMs. Owing to the Soviet invasion of Afghanistan, the treaty was never ratified. President Reagan asserted that the Soviets were not complying with the terms of SALT II in 1986 and withdrew from the treaty.

Time: Mid War
Side: Neutral
Ops: 3
Removed after event: Yes

SALT Negotiations is not quite at the level of the “Big Three” Mid War neutral events (Brush War, Junta, and ABM Treaty), but it’s pretty close.  The event has three parts:

  1. It raises DEFCON by 2 levels.  This is an easy way to get out of a DEFCON suicide situation, though beware your opponent dropping DEFCON twice in one move (via Duck and Cover or We Will Bury You).  It is also if you desperately need to coup a battleground, even if that means letting your opponent get in the first coup (and letting him coup Asia).
  2. It gives coups a -1 modifier.  Occasionally useful against Nuclear Subs, and somewhat eases the volatility of raising DEFCON.
  3. It retrieves a card from the discard.  This is obviously the most important part of the event. Here, SALT tends to favor the US.  Obviously both sides are interested in grabbing cards like ABM Treaty, Brush War, or Red Scare/Purge, but the US also has Grain Sales to Soviets, Colonial Rear Guards, Ussuri River Skirmish, East European Unrest (if in the Late War), and The Voice of America.  Usually the USSR has OPEC and Decolonization (occasionally De-Stalinization, if early in the Mid War).  (Note that although it is usually used on recurring events, there’s no reason why you couldn’t use SALT for a starred event that your opponent discarded.)
  4. A second benefit of retrieving this card is that it lets you hold an extra card to next turn.  This can be critical if you need to hold a card and also discard a card from hand (e.g., with Blockade).

Note that SALT Negotiations is most effective on Turn 6, and least effective on Turn 7.  And it is often a card I hold from turn to turn, waiting for something good to show up.  I am hesitant to play this for Ops, because I don’t like the risk that my opponent will draw it in the Late War, where there are even more events to choose from (e.g., East European Unrest).

SALTing for ABM Treaty deserves its own mention.  For starters, it’s ABM Treaty, one of the best events in the game.  In addition, it either gives you two coups in exchange for one of his, or it means you can also get in a DEFCON 4 coup.  Finally, it’s a great trick for the US to pull on AR7: play SALT for ABM Treaty, watch DEFCON rise to 5, and then headline ABM Treaty to engage in a rare Europe realign or coup.  This is one of the rare Twilight Struggle combos that cannot be stopped by the other player under any circumstances.

Posted in Mid War, Neutral Events | Tagged | 11 Comments

Quagmire

QuagmireQuagmire

1964 – 1975

It is hard to put a precise date on when US involvement in Vietnam ceased to be support for an anti-communist counter-insurgency and became instead an inextricable quagmire. However, Congressional passage of the Gulf of Tonkin resolution seems like as good a point as any. With hindsight, it is clear that the United States confused the very nature of the conflict that they were fighting. Vietnam was fundamentally a war of national liberation—a struggle that had begun centuries before against Chinese dominance, then French, then Japanese and finally the United States. While the American government may have never realized that they had fallen into the role of “foreign oppressor,” that fact did not diminish Vietnamese resistance. Like most colonial wars, it came down to a calculus of cost. US interests were simply not worth the costs in national morale, military manpower and economic resources that Vietnam was consuming. But humbling a superpower is a long process, and so it was in Vietnam.

Time: Mid War
Side: USSR
Ops: 3
Removed after event: Yes

As USSR

Quagmire has three main uses.  The first, and most direct, is that it cancels NORAD.  (It doesn’t actually prevent NORAD, so NORAD can still theoretically be triggered after Quagmire.)  If relevant, this is usually enough of a benefit for me to play it for the event.

The second is to hope that the US rolls really poorly and gets stuck in the Quagmire for an extended period of time.  If they fail their rolls, you get to conduct back-to-back Actions, one of the Holy Grails of Twilight Struggle.  The benefit of consecutive Actions is almost always immense: it can let you flip a battleground, get into an otherwise inaccessible region, set up a vital realignment, score a region undeservedly advantageously by temporarily breaking control, or a whole host of other possibilities.

Of course, the odds are against you.  If you play Quagmire and they successfully discard and roll, then nothing has really been accomplished, except you gave up a nice USSR event and probably so did they.

The real point of this second use is when you can tilt the odds towards you with Red Scare/Purge.  Timed correctly, you can deprive your opponent of many Action Rounds in a row, and as a bonus, strand them with low Ops cards that they must hold in hand for next round.  For example, if you headline Red Scare/Purge, and then spring Quagmire halfway through the turn, they might have no 3+ Ops events left.  In that case, not only can they not discard to Quagmire and be forced to skip a whole bunch of Actions (allowing you carte blanche to take over the world), those low Ops cards stay in their hand through next turn as well.  (If you are really lucky or sadistic, you can use SALT Negotiations or the luck of the reshuffle to grab another copy of Red Scare/Purge to do it all over again next turn …)

The third main use is to time Quagmire so as to force the US to skip a crucial round.  For example, you can play it as an AR7 play, to deny the US their own AR7 play.  Or you can headline it, causing the US to miss their AR1 and allowing you a back-to-back AR1 and AR2.  It is especially nice on Turn 10, because missing out on the Turn 10 AR7 play will usually come as a nasty surprise to the US.

Accordingly, I usually trigger Quagmire as USSR.  The main exception is if the US is under Containment for some reason, or if NORAD isn’t out and I desperately need the Ops.  But I will often hold it for a turn or two and hope to draw it with Red Scare/Purge, because that combo can be game-warpingly powerful.

As US

I almost always space Quagmire.  Note the crucial difference between Quagmiring yourself and being Quagmired: when the USSR Quagmires you, you usually just get out on the first discard, and nothing of value was lost.  But when you Quagmire yourself, you guarantee the USSR at least one set of back-to-back Actions, and possibly more.  (Note also that when you Quagmire yourself, the USSR gets to know in advance when you will be emerging from the Quagmire.)  There are simply too many things a strong USSR can do to you with a set of back-to-back Actions to risk self-Quagmiring, and cancelling NORAD only adds further fuel to the fire.

There are exceptions however.  Sometimes you have too many problematic USSR events in hand and the Quagmire discard is the only way to escape.  Rare is the hand, though, that genuinely calls for a self-Quagmire.  A better instance is when your last two cards are Lone Gunman and Quagmire and you can’t hold a card; here, Quagmiring yourself is the only way to avoid DEFCON suicide, because by skipping your Action Round with nothing to discard, you are “holding” Lone Gunman to next turn.

Posted in Mid War, USSR Events | Tagged | 28 Comments

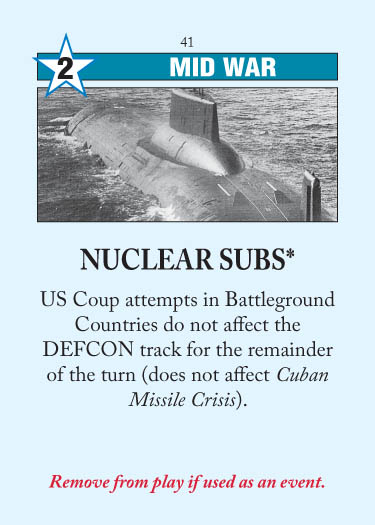
Nuclear Subs

Nuclear SubsNuclear Subs

1955

The United States launched the first nuclear powered submarine. It instantly antiquated decades of antisubmarine warfare that had developed during the Second World War. Admiral Hyman Rickover was to oversee the development of a new nuclear navy, and create a third, and seemingly invulnerable arm, in the American nuclear triad. Ultimately, the Soviets would follow suit.

Time: Mid War
Side: US
Ops: 2
Removed after event: Yes

As USSR

One of those “for the remainder of the turn” events that is best dealt with by playing it on the last Action Round.  An AR7 play of Nuclear Subs will still hurt, since permitting any battleground coup is unpleasant, but the US player may not have planned for it (perhaps he had planned an AR7 play or a Space Race discard), and the US player may not in fact even be able to use it (if he has a scoring card left).

So Nuclear Subs is not a big problem when you draw it.  It’s much more dangerous when the US headlines it against you, causing your African battlegrounds to tremble in fear.  Against such a headline, there are several possible responses.  The best is to overwhelm the US with threats everywhere else.  Coups are still restricted geographically by DEFCON, and because they take up your entire Action Round, a round spent defending against influence into Europe or Asia is a round where the Nuclear Subs must stand idly by.

I also like to keep DEFCON high: this can mean either playing SALT Negotiations (double bonus by imposing a -1 on all coups), or just leaving DEFCON at 3 at the beginning of the turn.  This allows you to respond to the US battleground coups with a coup of your own: rather than allowing them the last word over and over again, you can choose a country to retaliate in.  This can even make Nuclear Subs a detriment for the US, as their coups no longer drop DEFCON and lock you out of a response coup.

Depending on the likely target of the US coups, non-battlegrounds become quite lucrative.  If you control the right ones, you can consistently respond to the US coups with realignments.  The US will be hesitant to coup non-battlegrounds during the turn, and even if you can’t set up a realignment you can often grab enough countries to deny Domination.

Occasionally you can pull off a fancy play with Yuri and Samantha, Latin American Death Squads, or even Cuban Missile Crisis, though I find such circumstances to be rare.

Finally, there is no better feeling than being able to harmlessly dump CIA Created, ordinarily a DEFCON suicide card, after the US plays Nuclear Subs.  (This is incidentally a good reason to play Nuclear Subs yourself, say on AR6, so that you can dispose of CIA on AR7).

As US

Given the risky nature of coups, this event is best for taking over a USSR-controlled Africa, or perhaps getting into South America if you have been locked out entirely.  1-stability countries are near-guaranteed successes on coups, but 2-stability countries are much more risky.

Beware that couping is an action without flexibility.  (An alternative way to put it is that coups are “expensive” in terms of Action Rounds, compared to direct influence placement.)  You can’t coup a little bit here and place some influence there.  By committing yourself to coups, you expose yourself to ripostes elsewhere on the board.  Against a good USSR player, you will often find yourself agonizing over whether to respond to the USSR (thereby wasting your Nuclear Subs) or to coup (thereby giving the USSR free rein).  A US player too aggressive with her Nuclear Subs will often simply run out of Action Rounds and cards.

On the other hand, Nuclear Subs is still a fine headline even if you don’t intend to coup on every Action Round.  As is generally true in Twilight Struggle, sometimes the threat is worse than the execution.  The mere possibility of Nuclear Subs coups can compel the USSR into a premature Africa Scoring or other suboptimal plays.

Posted in Mid War, US Events | Tagged | 9 Comments

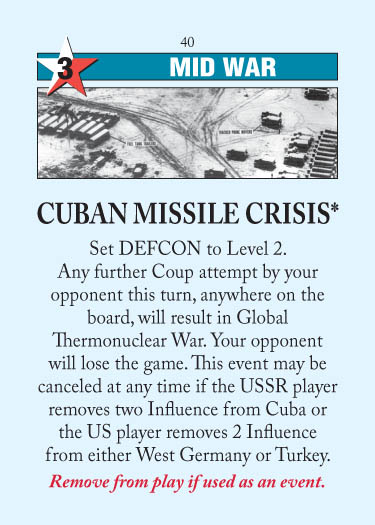
Cuban Missile Crisis

Cuban Missile CrisisCuban Missile Crisis

1962

The mere mention of this event elicits fears of the nuclear holocaust that almost was. For 14 days in October 1962, the two superpowers seemed destined to clash directly about the Soviet emplacement of Medium Range Ballistic Missiles (MRBMs) and Intermediate Range Ballistic Missiles (IRBMs) in Cuba. To prevent the installation of additional offensive weapons in Cuba, John F. Kennedy declared a naval quarantine around Cuba. Tensions reached a near breaking point when a U-2 flight was shot down over Cuba, and Khrushchev demanded US missiles be removed from Turkey in exchange for Soviet missiles being removal from Cuba. Ultimately, Khrushchev was compelled to settle for a US pledge not to invade Cuba, and a private agreement to resolve NATO’s missile bases in Turkey.

Time: Mid War
Side: Neutral
Ops: 3
Removed after event: Yes

An ostensibly neutral event that in practice is of far more benefit to the US than the USSR.  The event accomplishes several things:

  • It lowers DEFCON to 2, so as a headline it is useful to deny the USSR a battleground coup;
  • It prevents the opponent from further coups without removing influence from Turkey/West Germany or Cuba.

Now, as US, it is not usually a big deal to remove two from Turkey or West Germany: you’ll almost always have at least two influence in one of those two countries, and removing influence is not a big deal for either of them.

As USSR, however, this event is very problematic if Fidel hasn’t been triggered.  If you don’t have influence in Cuba, then you can’t remove it, and so you are essentially locked out of coups for the rest of the turn.  This has a number of effects:

  • The US is able to play Lone Gunman, which is no longer a DEFCON suicide card;
  • The US can play Che without repercussion;
  • The US can raise DEFCON (via SALT Negotiations or How I Learned to Stop Worrying) and then coup away freely;
  • The USSR is unable to play DEFCON-raising cards (in particular the USSR is now unable to trigger SALT Negotiations or ABM Treaty) without allowing the US several easy coups.
  • The US will certainly earn at least 2 Mil Ops VPs, and possibly more if they can raise DEFCON;
  • The US can spread freely through non-battlegrounds without fear of being couped.

Of course, the USSR can reap some of these benefits as well (it is nice not to have to worry about Nuclear Subs!), but it is rare for the US to have no influence in either West Germany or Turkey.

Even if the USSR does control Cuba, a Cuban Missile Crisis headline is still pretty annoying, because losing 2 influence in Cuba makes it quite vulnerable.

Finally, Cuban Missile Crisis is a decent headline if you anticipate that your opponent’s headline will lower DEFCON and be subsequent to yours.  For example, as US, if the USSR headlines Olympic Games (or Missile Envy, and you hold We Will Bury You), then a Cuban Missile Crisis headline will win you the game.

A couple of rules pointers:

  • The influence removal is not an Action and can be done at any time. (It is unclear whether you can actually do this in the middle of your opponent’s Action, i.e., after he announces an intent to coup or realign Cuba, but this is probably an area better suited for sportsmanship than explicit timing rules.)
  • The Cuban Missile Crisis win condition takes precedence over a DEFCON-lowering coup, so Lone Gunman is no longer a DEFCON suicide card if the USSR is under its effect and cannot cancel it.  (Presumably Lee Harvey Oswald is unable to assassinate Kennedy until he has successfully resolved the Crisis.)
  • The text of Nuclear Subs (which confusingly reads “Does not affect Cuban Missile Crisis”) simply means that a US player with Nuclear Subs is not immune from the effects of the Cuban Missile Crisis.
  • Cuban Missile Crisis applies to all coups, including “free” coups (through Junta or Tear Down This Wall).
Posted in Mid War, Neutral Events | Tagged | 30 Comments

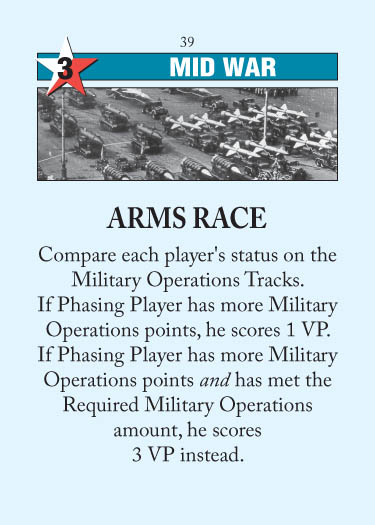
Arms Race

Arms RaceArms Race

1947 –1989

The arms race between the Soviet Union and the United States was at play throughout the Cold War, and many attribute the Soviet Union’s collapse to an inability to sustain the final arms race instigated by Ronald Reagan. This element of competition between the nations involved both nuclear and conventional weapons. Frequently, there was an interplay between the two kinds of forces. During the early Cold War, the United States (having rapidly demobilized after World War II) had to rely on its nuclear weapons in a doctrine of “massive retaliation” to counter Soviet preponderance in conventional weapons. After the Soviets developed nuclear weapons of their own, both powers reverted to a system of flexible response. Underlying nuclear strategy throughout this later era was the concept of mutually assured destruction. This reality made the likelihood of direct superpower conventional warfare unlikely. However, the dynamic of conventional weapons competition had its own paradigm. There, the West relied on superior technology to design higher performing weapons to compete against the massive numbers that could be generated by the Soviets’ command economy.

Time: Mid War
Side: Neutral
Ops: 3
Removed after event: No

Note that it doesn’t matter whether your opponent has met his Military Operations requirements: all that matters is whether you have, and whether you have more than he does. Usually it will be the USSR that benefits from this event, but a US player with ABM Treaty or something similar can often benefit as well.

Assuming that you will not be playing this for the 1 VP (absent extraordinary circumstances), Arms Race thus becomes a rather straightforward choice between 3 Ops or 3 VPs.  In this, Arms Race is quite unlike most of the Ops-for-VPs events in that it is actually worthwhile: 3 VPs are often superior to 3 Ops, especially late in the Mid War.  (Compare to say, U2 Incident.)

But it depends on how you’d use those 3 Ops: flipping a battleground, in and of itself, is only worth 2 VPs, but denying or achieving a Domination bonus adds an additional 2-4VPs, depending on the region.  So for example, if you have no other options, Arms Race is better used for Ops if you are flipping a 1-stability African battleground and achieving Domination as a result.  But if you already have Domination, 3 VPs are better than those 3 Ops even if you flip the battleground.

Ideally, you want to wait as long as possible in the turn to decide whether you need Arms Race’s 3 Ops, or if you can get by without and get the VPs instead.  Of course, it is never so easy in Twilight Struggle — the longer you wait, the more likely it is that your opponent equals your Mil Ops, at which point the 3 VPs are no longer available to you.

As a rule of thumb, I tend to play Arms Race for VPs towards the end of the Mid War (even holding it between turns if necessary), and early in the Mid War I hold it until the end of the turn and look for an opportunity to trigger it for VPs.  In the Late War I will almost certainly take the 3 VPs (and actively try for it).

As a final note, Arms Race is often pretty high up on the list of “lousiest cards to receive through Missile Envy”, despite the thematic appropriateness.

Posted in Mid War, Neutral Events | Tagged | 11 Comments

Regions: Southeast Asia

Southeast Asia ScoringSoutheast Asia Scoring

In Southeast Asia the process of decolonization intertwined with superpower rivalry in particularly deadly ways. Beginning with the British counter-insurgency in Malaya, to the US wars in Vietnam and Cambodia, and ending in 1979 with the Sino-Vietnamese war, Southeast Asia would command American attention like no other region. However, after America’s humiliating withdrawal from the region, it would cease to play a central role in Cold War politics.

Time: Mid War
Battlegrounds: 1
Countries: 7

General Considerations

The main contested countries in the Early War are Burma, Laos/Cambodia, Indonesia, and Thailand.  The USSR almost always ends up with control of Vietnam, while the US almost always has 1 in Malaysia and 1 in the Philippines by the end of the Early War, leaving the USSR loath to fight for either.  By the Mid War, Burma will be sewn up, and then it’s a fight for the 1-stability countries, and of course, Thailand, a 4VP swing.

Early War

Since Asia is probably the most fought-over region in the Early War, Southeast Asia can’t help but get dragged into the fight.  Thailand is obviously of critical importance, but both sides also have an interest in taking Laos/Cambodia (limit access from Southeast Asia into western Asia) and Burma (ditto, plus Indo-Pakistani War modifiers).  Malaysia is not frequently contested, since it’s more of a stepping stone to Thailand, nor are the Philippines, but Indonesia often gets a little visit from Decolonization.

Usually the US ends up doing better in the region, but Vietnam Revolts and/or an early Decolonization will usually sew it up pretty securely for the USSR.

Occasionally, you will see an Early War Asia fight that boils down to total country count, and here you’ll see one side (usually the US) down battlegrounds but able to deny Domination by controlling lots of Southeast Asia countries.

Mid War

The battle for Southeast Asia is usually already decided in the Early War.  As the USSR, try to play Southeast Asia Scoring before the US can spare Ops to secure Malaysia and the Philippines.

The main fight will be over Thailand, easily the most valuable country, amplified by the fact that this will also affect Asia Scoring as a whole.  Expect Brush War, ABM Treaty (if used at DEFCON 3), the China Card, and Ussuri River Skirmish to all play a role in deciding Thailand’s fate.

Late War

No Late War event explicitly targets Southeast Asia, and more to the point, Southeast Asia Scoring is usually no longer in the deck.

Posted in Mid War, Neutral Events, Regions | Tagged | 7 Comments

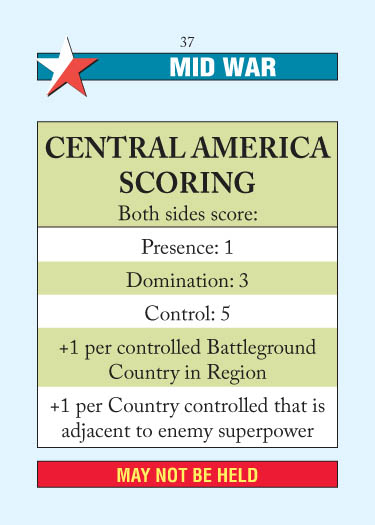
Regions: Central America

Central America ScoringCentral America Scoring

Central America and the Caribbean were frequently termed America’s “backyard” and “lake.” With the advent of Fidel Castro in the 1959, Americans could no longer take the region for granted. The US reaction to communist influence in the area provoked direct US military intervention in the Dominican Republic (1965) and Grenada (1983). In the closing years of the Cold War, Nicaragua, El Salvador and Honduras, became frontline states in the struggle between the superpowers.

Time: Mid War
Battlegrounds: 3
Countries: 10

General Considerations

If I had to pick one region to ignore, I’d probably pick Central America.  Not that it isn’t important, but by definition, one of the regions has to be the least important, and that region is usually Central America.  Domination is a measly 2VP bonus, meaning that Dominations usually score at +3VP for the US, and it’s very difficult to hold onto Domination because almost all the non-battlegrounds are so volatile and low-stability.

On the other hand, the region’s main role in the game is a point source for the USSR.  In general, the USSR is going to benefit a lot more from Central America scoring because Mexico/Cuba essentially score double.  And although the US theoretically has easier access to those battlegrounds, Fidel in practice often sews up Cuba for the USSR, and an early game coup of Panama can leave the Gulf of Mexico feeling very communist indeed.

Central America does offer the potential for one of the easiest Dominations in the game.  As US, a fortified Panama with control of Costa Rica can easily keep the USSR out of the region and allow an easy +4VP.  More commonly, both sides get into the region, and one country will control two battlegrounds, while the other tries to take a lot of non-battlegrounds to stop Domination.

The USSR often ends up with difficulty getting out of Cuba; without a coup or Liberation Theology, they don’t really have a shot at Panama or Mexico from Cuba.  In addition, Cuba and Mexico are extremely vulnerable to US realignment, made all the more volatile by their adjacent 1-stability realignment-modifying non-battlegrounds.

Early War

The USSR has Fidel, which is a pretty easy route into Cuba.  Although theoretically De-Stalinization could place influence here, it is not worth it: Panama is more easily couped, Mexico is easily realigned, and Cuba is likely yours anyway.

The US rarely plays here in the Early War.  Once in a while you might shore up Panama, or add an influence into Costa Rica, but otherwise that’s that.

Mid War

The primary USSR event here is Liberation Theology.  This is like Decolonization for Central America, in a way, and it is often a lifesaver because the USSR has a difficult time moving out of Cuba and into Panama or Mexico without a coup.  Che ostensibly provides some support for the region, but the USSR’s chances are really somewhat defined by their coup success and Liberation Theology.

The US does not really need events for Central America: their Mid War events (OAS Founded, Nuclear Subs, and The Voice of America) are often better used in other regions.  The main exceptions are Panama Canal Returned, though even that is most useful for getting into Venezuela; Puppet Governments, which if it comes out late enough is probably best used to just grab a whole bunch of Central American non-battlegrounds; and Alliance for Progress, the “US OPEC” which just gets better and better as the game goes on.

Likewise, the neutral events are often too valuable to be used in Central America, but Junta, ABM Treaty, and Brush War can all flip a country very easily.  Junta in particular can be used for some brutal realignments by either side.

Latin American Death Squads is theoretically most helpful here, because a Domination fight often ends up turning on who controls more non-battlegrounds, as both sides coup the 1-stability non-battlegrounds back and forth.

Late War

The only events of note here are Yuri and Samantha, which accomplishes much the same thing that Latin American Death Squads did in the Mid War, and Ortega Elected in Nicaragua, which is a pretty lousy event but a DEFCON-suicide card for the US if the US has influence in Cuba.

Posted in Mid War, Neutral Events, Regions | Tagged | 3 Comments

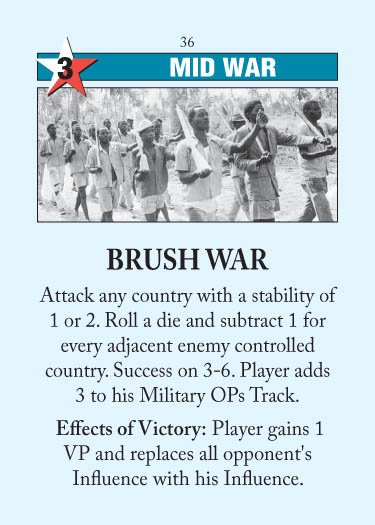
Brush War

Brush WarBrush War

1947– ?

Also characterized as low intensity conflicts, brush wars tended to begin in reaction to local conditions either within a state or between states. However, due to duration, or superpower intervention, an essentially local dispute could be elevated to superpower conflict. Examples include the civil war in Mozambique and the war between Ethiopia and Somalia.

Time: Mid War
Side: Neutral
Ops: 3
Removed after event: No

One of the Big Three Mid War neutral events, along with ABM Treaty and Junta.  Unlike ABM Treaty, it works well regardless of how fortified the battleground is; unlike Junta, it can still flip countries even at DEFCON 2 and is not geographically restricted.  Brush War’s drawback is that it depends on isolation, but isolation can be manufactured, and even with one neighbor, you still have a 50% chance of success, and those are pretty good odds for a heavily-defended battleground.

Brush War is most commonly used on 2-stability battlegrounds because the 1-stability African battlegrounds are easily flipped by coups or direct influence placement.  In addition, I especially like to use it on Thailand, Pakistan, or Italy: countries that are normally not subject to coups at any point, and therefore very difficult to flip once controlled.  Thailand in particular I find is a frequent Brush War target: unlike Pakistan or Italy, it is not always necessarily surrounded by similar influence.

Of course, Brush War can (and often does) play a key role in the Mid War regions as well.  It just happens to stand out as one of the few events that can immediately flip a European or Asian 2-stability battleground, in an otherwise very stable pair of regions.  The shifting demands of the game, of course, will dictate where Brush War ends up being used.

In general, the US benefits a little bit more from Brush War than the USSR: the USSR has coups, while the US often struggles to get Mil Ops and flip battlegrounds at DEFCON 2.  Plus, Italy (a lucrative Brush War target) is often off-limits to the USSR’s Brush War if NATO has been triggered.  (Not that you would, as US, play NATO to protect Italy from Brush War very often, but it’s a nice benefit if the USSR played NATO for you.)

Posted in Mid War, Neutral Events | Tagged | Leave a comment

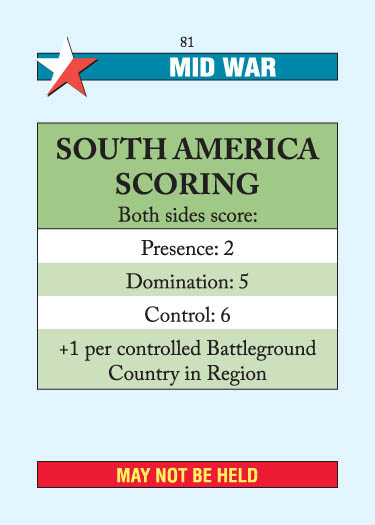
Regions: South America

South America ScoringSouth America Scoring

The regional penchant to turn to strong men or military juntas to resolve questions of instability made South America ripe for leftist reaction throughout the Cold War. Rising nationalism and the world-wide wave of anti-imperialist sentiment also characterized the relationship with the United States and the nations of South America. The Soviets sought to exploit any openings offered, and established close relations with nations like Argentina. The greatest potential realignment in the region was squashed by an allegedly CIA-instigated coup of Chile’s Salvador Allende.

Time: Mid War
Battlegrounds: 4
Countries: 10

General Considerations

South America offers the potential for some of the most lopsided scoring in the game.  With only 4 battlegrounds, closely-linked, it is the easiest region to gain Control over.  In particular, a great many USSR Mid War victories can be attributed to a De-Stalinization into South America that locks up the four battlegrounds early.

Even if you don’t gain control, the difference between a 2-2 battleground deadlock and a 3-1 Domination is 5VP.  This is equal to a typical Europe Domination, and further suggests that along with Africa, South America is one of the key regions of the board.

The eventual trend of the continent is to tilt towards the United States.  The USSR must rely on either De-Stalinization, coups, or neutral events in the Mid War, while the US has a plethora of events (including OAS Founded, one of the most irritating 1 Ops events in the game).  Accordingly, it is important for a USSR that did manage to De-Stalinize into South America to lock up the region securely, so as to defend against an eventual US onslaught.

South America is also rife with potential for realignments, as it is the only region where every battleground can be subject to an easy realignment.  Common scenarios include Chile/Uruguay realigning Argentina, Colombia/Brazil realigning Venezuela, Venezuela/Uruguay realigning Brazil, and Peru/Argentina realigning Chile.

Early War

The USSR has the easier job of getting into South America, but if and only if he draws De-Stalinization.  If he does, then South America control should be easy; otherwise, the USSR’s only hope is to attack the US with coups and events.

The US has only one Early War option for South America, and that’s the AR7 play into Colombia (AR6 in this case, since this is the Early War).  Personally, I’m not a fan of this move.  As USSR, I’m totally happy to just coup Colombia and give up a battleground coup; usually, in the Early War, the US is not terribly interested in battleground coups anyway, and certainly not at the cost of letting the USSR into South America with a strong Colombia coup.  On the other hand, if the USSR is already in South America thanks to De-Stalinization, then the AR7 play into Colombia is still unlikely to succeed but at least has little downside.

Mid War

Many Mid War events directly or indirectly target South America.  The USSR, however, has very few options, with its only events being:

  • Allende
    • A good desperation way to get into South America if De-Stalinization has not come out.
  • Che
    • A nice way of responding to two threats at once, creating two threats at once, or responding to one and creating your own simultaneously.

The US has:

  • Puppet Governments
    • If played early enough, this serves as a psuedo-De-Stalinization, perfect if South America is still empty.
  • Panama Canal Returned
    • A straightforward way to get into Venezuela, very useful as an AR7 play or to get into an empty South America
  • Nuclear Subs
    • Although not as persuasive as in Africa, Nuclear Subs offers the US a rare opportunity at multiple battleground coups.
  • OAS Founded
    • A total pain for the USSR to deal with, and a good way to get into an empty South America (though make sure DEFCON is at 2, lest you get couped out immediately).
  • Alliance for Progress
    • The “US OPEC”.  Usually, however, it’s not worth very much when it first comes out; better to let it stew and collect more points in the Late War.
  • The Voice of America
    • Extremely effective at eliminating the USSR from subregions of South America, especially as Venezuela and Brazil are both 2-stability countries.

In practice, the USSR will hope to draw these neutral events:

  • Brush War
  • Junta
  • ABM Treaty
    • The Holy Trinity of Mid War neutral events, with each serving its own purpose: Brush War attacks isolated battlegrounds, without regard for overcontrol; Junta is a flexible card that allows you to either get access to a region, create realignment opportunities, or coup in the headline phase; and ABM Treaty is … well, it’s a 4Ops battleground coup!  What more could you ask?
  • Latin American Death Squads
    • This is usually a non-factor, since it’s mainly useful on non-battlegrounds, and South America does not feature many non-battleground coups.

If the USSR did not draw De-Stalinization, and did not draw the neutral events to contest South America, then coups are their only real chance to contest the continent, and absent extraordinary luck they are probably going to break even at best on the region.

In the Mid War, the region can change hands surprisingly quickly.  Realignments are a key aspect to controlling South America: a US player that controls Colombia/Venezuela/Brazil/Uruguay, with no Soviet influence in any of those four countries, will be very difficult to knock out.

In general, Venezuela tends to be the most contested country, for two reasons: it scores on OPEC, and Colombia is somewhat difficult to hold onto long enough to realign Venezuela.

South America is a region where consecutive plays are critical: taking over a battleground often involves two steps, and so it’s a one of the most tense regions on the board, as you and your opponent jockey in attempts to set up a critical realign.  This is why Junta and Che are such strong events: Junta lets you prepare for and realign in a single Action Round, and Che allows the USSR to do two things at once, be it respond to a threat or create one of their own.

Late War

In the Late War, the USSR gets a little help in the way of events, and the US must rely on their continued Mid War events:

  • The Iron Lady
    • In theory a US event, but in practice a USSR event.  The loss of Socialist Governments hurts a little, but being able to flip Argentina is more than worth it.  It should go without saying that the UK effect is worthless.
  • Latin American Debt Crisis
    • As US, I usually prefer to just let this trigger and not discard.  As USSR, it is a good way of pressuring the US by either making them give up a high Ops card or dramatically altering the situation in the region.
Posted in Mid War, Neutral Events, Regions | Tagged | 8 Comments